Popular methods of connecting pipes. a detailed overview
When installing a heating system, sewerage and water piping in the mandatory manner will need to solve the problem of connecting the pipes. At the same time it will be necessary to take into account the material of which the pipeline is made, the conditions of the system and many other parameters. Studying the variety of existing methods of connection, it is not superfluous to consider the most popular options.
Considering the methods of work. cutting straight or at an angle. take into account the different material of the workpieces to be machined. Thus, hoses made of polypropylene or thin copper are easier and easier to cut than thick-walled steel pipes.
Plastic products of small diameters are cut at the desired angle with special scissors. You can control the angle with an ordinary protractor. Cutting polymer pipes is also made with an ordinary hacksaw with a fine-toothed blade.
The most common installation requirement is to cut water, sewer and ventilation pipes at a 45º angle.
Let’s find out what tools can be used for cutting at different angles.
Paper template for a pipe
For relatively precise cutting, you can use a simple technique, where an ordinary sheet of paper acts as a kind of template. For example, printer paper of A4 size is suitable for making a template.
The sheet is preliminarily marked under the square using a ruler. The size of the diagonal of the square should be equal to the length of the circumference of the pipe you need to cut. The surplus parts of the sheet are cut off.
- Bend the sheet diagonally by aligning the opposite corners.
- Turn the resulting triangle so that the line for the hypotenuse trimmer is perpendicular to the axis of the pipe.
- In this position wrap the paper around the pipe surface, aligning the extreme points of the hypotenuse together.
- Using a marker, mark the cut along the line of any of the triangle’s cathetuses.
- Cut the pipe along the marked line.
It is convenient to use this method to mark and cut pipe with a 45º angle in the diameter range from 32 to 63 mm. For greater convenience of marking it is recommended to take a thick, but soft paper. You can also use paronite and similar materials.
How to choose the right pipe cutter for plastic pipes and how to use it in practice is described in detail in our article.
Competently made templates for the shape cutting of the pipe make it possible to perform the cuts with the utmost accuracy. A gap is still present between the prepared workpieces. In the connection of metal pipes, it is “closed” by a welded seam, when connecting plastic parts, a specialized cord for soldering is used.
Angle of cut programs
Template technology makes it possible to obtain different cutting angles. But in order to form a template for angles other than 45º, it will be necessary to perform mathematical calculations and according to the calculated data to cut a template from paper or similar materials.
True, there are computer programs designed to save the master from making calculations. Such programs print out templates for pipe cutting.
Easy calculation program based on MS Excel application allows to calculate and template almost any value of pipe diameter and required cutting angle.
All the user has to do is to enter the appropriate values into the cells “Outer diameter” and “Angle of cut”. These parameters are used to form a template that can be sent for printing.
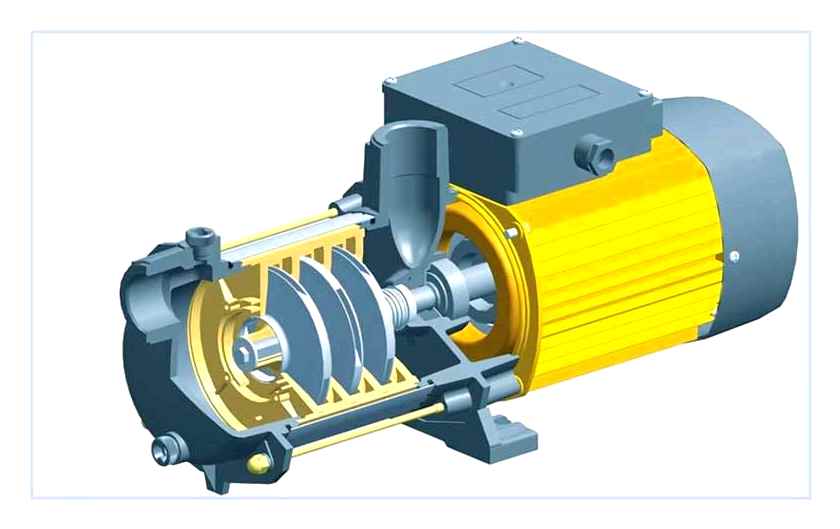
Borehole pump units and automation
For water intake from wells surface and submersible pumps of centrifugal operating principle are mainly used. The advantage of this design is the ability to create a high head in the line, through the use of units with a large number of impellers, allowing to increase the pressure in each subsequent stage.
Household submersible pumps can lift water from very great depths (about 200 meters), while surface types are used in sources with a water mirror at a depth of up to 9 meters from the ground surface. To increase the depth of intake of surface models, sometimes use built-in or submersible ejectors, though their efficiency drops significantly.
Accumulator, relay and manometer
To automate the operation of water intake pumping equipment is used well automation or pumping station, consisting of the following devices:
- Accumulator. Is a volumetric metal tank with a rubber bulb inside, which fills with water when electric pump is on. Device prevents water hammer in the system and optimizes the operation of electric pump by reducing the number of cycles of switching on and off.
- Relay. The main element of the automatic control system is the pressure switch, which is connected to the line by a socket. If the system pressure exceeds its setting, the built-in diaphragm inside the relay housing interrupts the supply voltage to the electric pump through a mechanical system, and it shuts down. After water consumption and when the system pressure drops the relay closes its contacts and switches on the motor pump.
- Pressure gauge. The device is one of the basic elements in any water system, it allows to control the pressure and adjust the equipment.
Structural design of water wells is not very complicated, the main internal elements that are installed during drilling are casing and filter in the bottomhole area. For water intake after the installation of the well, use additional equipment and engineering systems (caisson, ogolovok, adaptor), allowing you to effectively connect the electric pump to the source, given its location and type.
Inserting the pipe into the pipe: how to properly mark and cut the junction area without special. tools
It is often necessary to connect two round pipes of the same diameter under 90 degrees. Making such a connection “by eye” does not guarantee the quality and durability of the joint. But if you use a fairly simple marking, anyone can do it.
- two round pipes of the same diameter;
- Marker, measuring tape and compass;
- a core and a hammer;
- bench vice;
- angle grinder;
- hand file;
- a piece of cardboard;
- scissors, etc.
The process of marking and cutting out the cross-jointing area of two identical round pipes
On the form of one pipe, mark the center of the joint with the other pipe. we work with pipes with an outer diameter of 60 mm. Nothing will change if they are of a different size.
Let’s put the compasses legs half the pipe diameter, i.e. е. by 30 mm, which is also its radius. We put the compass foot to the previously marked point on the surface of the pipe and draw a circle on it.
Through the marked point (circle center) draw an imaginary section perpendicular to the pipe axis. From the points of its intersection with the circle drawn by the compass, set aside 5 mm in each direction.
Draw lines, which pass through the marked points and smoothly conjugate to the circle line.
Cut out the material inside the external closed line drawn on the surface of the pipe with an angle grinder. Remove burrs and smooth out any rough edges with a hand file.
Around a piece of the second pipe, set vertically on a sheet of thick paper or cardboard, spend a circle with a marker and cut out a circle with scissors, bounded by it.
Fold the cut out cardboard circle in half by diameter, mark the line for the bend trimmer, straighten it out again and lay it evenly on the end face of the pipe with the mark of the bend line outwards.
Mark the intersection points of the bend line (diameter) of the circle with the cylindrical surface of the pipe with a marker.
We divide a fishing line for a trimmer of a bend of a cardboard circle into three equal parts on 20 mm and we bend one of external parts of a circle on a line (chord), perpendicular to diameter, and passing through a mark of the extreme point of 20 mm.
We cut the obtained segment along the chord with scissors and attach it to the external surface of the tube so that the chord is at the level of the tube’s end and its center coincides with the marking made on the tube.
Holding the cardboard segment in that position, trace the arc of the segment on the surface of the pipe with a marker. Repeat this procedure with the second point on the pipe from the opposite side.
Remove the metal of the pipe, bounded by the drawn lines, on both sides, and smooth out the sharp edges and corners.
Connect the pipes in the only possible position and weld the contact lines.
Using a reservoir with water
What to do if we are dealing with a pipe of small diameter, and we need to cut the pipe at an angle somewhere near the edge? A deep container filled with water will come to the rescue. Before you begin, calculate the angle of inclination and make a mark on the vessel. Then we just need to carefully lower the edge of the pipe in the water and bend it to the mark on the tank. Pull out the pipe, mark the line for the trimmer contact with water, and boldly cut according to the markings. This method is good for marking a large number of pipes. A ready template from a container of water will speed up our work.
Choice of welding modes
The quality of the expected weld largely depends on the correct setting of parameters of the mode. Its choice involves specifying the following parameters:
- What electrodes we are going to use for the job (their characteristics and diameter);
- values of the parameters of the supplied current (including its type: direct or alternating);
- welding arc voltage;
- the speed of the process;
- Number of passes required to fill the weld.
The quality of connection largely depends on the choice of these parameters. Depending on the brand of metal from which the tube is made and the thickness of its walls, choose what electrodes to make the connection. If the welding mode is chosen correctly, the weld will be good and reliable.
joining of pipes at any angle
Press the cross section to the two inclined sections and find a point on the inclined section, the distance from which to the cross section will be exactly equal to the width of the joined profile pipes.
From the received point on the surface of a cross section we guide a slanting line for a trimmer to the most remote external point of its end face and cut off on this line a triangular fragment. do the same on the other end of the crosswise pipe.
We bring the cross pipe in contact with the two inclined pipes and get two more joints. Then the obtained joints can be welded or connected with the help of plates and bolts.
How to mark the pipe for accurate trimming for 90 degree elbow welding
In the absence of truncation saw for metal to cut the pipe at 45 ° to weld it into 90 ° elbow is very problematic. If you do it with an angle grinder, you need a very accurate marking. You can make it using an ordinary piece of paper.
What will be required:
The tube should be wrapped with a piece of paper, put the edges together and cut off the excess. The result should leave a trim that wraps around the tube with an even joint along the transverse line.
In this case you get 60mm. Prepared sheet is folded in half, and on it is held transverse line for the trimmer at a distance from the edge equal to the diameter of the pipe, that is 60 mm.
The marked area is divided into 3 parts by two longitudinal lines. They are indented on the sides at a distance of the radius of the tube, ie 30 mm.
Next you need to inscribe a semicircle in the side rectangles, to do this, the end of the pipe is put to them and circled. Then you need to draw a line for the trimmer under the ruler, as in the photo.
As a result we get a template. It should be wrapped around the pipe and around. If you then cut it on this line, then docking the edges of blanks, we get a perfect 90 ° elbow.
How to make an elbow of 90 degrees from a pipe
The easiest option. find a reference book on the manufacture and installation of piping. It has drawings for manufacturing with reference dimensions. To make it, you will need to make patterns from cardboard or a thick sheet of paper, outline them on the pipe, and then use an angle grinder or gas to cut out the parts and weld. Particular attention should be paid to the quality of welds, as it is much easier to underweld and check the product is not assembled, than later to climb in the corners and look for leaks.
Pipes up to 100 mm in diameter bend on the pipe bender by heating, and generally do not need to make special fittings. Usually for making an angle of 90 degrees you use 3-4 segments. If the diameter of the pipe will be 100-159 mm, 3 segments are enough. With a diameter of over 159 mm you already use 4 segments. Manufacture of 90 degree fittings for pipes over 180 mm in diameter is possible with the use of 5 or more segments to whirl the flow was not as large.
How to hold the angle grinder correctly
Many people have an angle grinder, but most people do not know how to use it correctly and how to hold it. This leads not only to defects in the work, but also to serious injuries. angle grinder is a rather dangerous power tool. The circle should be installed with the drawing up and clamped by a special nut.
The person with the leading right hand holds the angle grinder by the handle with the right hand. The wheel should be on the left side of the machine and the guard should cover it from above. The rotation is such that sparks fly to the worker while he is cutting. If the angle grinder’s wheel jams and the angle grinder breaks free from your hands, it will not go to the cutter, but to the opposite side.
Your left hand holds the machine by the handle, which you screw into the threaded hole in the body. There are several there for special use cases, but the correct position of the handle is only the top.
This position of the machine requires the use of protective equipment. To protect your eyes and exposed part of your face. safety glasses, or even better. a protective mask. A suit of thick material must be worn to protect the exposed parts of the body from sparks and flying debris when cutting.
How to hold the angle grinder correctly
Many people have an angle grinder, but most people don’t know how to use it correctly and how to hold it. This not only leads to rejected work, but also to serious injuries. An angle grinder is a pretty dangerous power tool. The wheel must be mounted with the pattern upwards and clamped with the special nut.
The person with the leading right hand holds the angle grinder by the handle with the right hand. In this case, the wheel should be located on the left side of the machine, and the safety guard should cover it from above. The rotation is such that sparks fly at the workman while he is cutting. If the angle grinder’s wheel jams and the angle grinder breaks free, it will not go to the cutter, but to the opposite side.
The left hand holds the machine by the handle, which is screwed into a threaded hole in the housing. There are several of them for special applications, but the correct position of the handle is only at the top.
This position of the machine requires the use of protective equipment. To protect the eyes and the open part of the face. it is goggles, and even better. a protective mask. To protect exposed parts of the body from sparks and small fragments during cutting, a suit of thick material should be worn.
How to properly weld the fitting
In order to make a beautiful and reliable installation of the pipeline and weld a branch to a pipe 90 degrees you need to choose the right welding machine and electrodes. This information is better to search for profile forums where specialists will gladly tell you what electrodes and welding machine operating modes they use in their professional work.
Pipeline parts are welded by butt welding, this is when the edges are tight against each other. The thickness of the electrode for such work is taken 2-3 mm at a welding voltage of 80-110 Ampere. In order to get inside as little as possible burnt metal the electrode should be placed at an angle of 45 O to the surface. Round pipes should be welded in one continuous seam. After welding, you must wait until the weld has cooled down completely and beat off the slag, and only then move on to the next weld.
In order to make a beautiful and smooth joints it is necessary to cram your hand, so do not despair if you will not succeed at once. Practice welding just a few small pieces of pipe beforehand. And only after that you should proceed directly to the welding of the pipeline.
When installing piping, it is often necessary to cut the pipe at a certain inclination. When performing this task, accuracy plays a big role. There are a few simple ways to cut a pipe at an angle.
The wrong pipe cut will result in the inability to install the structure in the shape originally intended. For example, if it is planned to turn the system on 45 degrees, it is necessary to make a cut of a pipe under 45 degrees. To perform the task you will need tools for marking and angle grinder (you can replace it with a hacksaw for metal).
Possible errors
Sometimes the heating burns through the profile. To avoid this, it is necessary to perform a number of actions:
- Insert a metal bar inside the pipe in accordance with the size of the hole.
- Do not stop the electrode in one place.
- Reduce power output.
- Perform pre-welding with dots, then join them with a solid seam.
It is possible to train in advance to work on rough parts.
Various metal constructions are made of profiled pipes. To make them with your own hands, you need to master the working process using a welding machine. After familiarizing yourself with the nuances, you can make a strong connection without much difficulty.
What is a profile pipe
Profile pipes Profile tube is a type of rolled steel tube, it is made by forming from round tube. After deforming by thermal method, stress is removed from the metal. The material for the product is carbon steel or stainless steel. The cross section of the tube varies from 10×10 mm to 500×400 mm. Their wall thickness varies from 1 to 22 mm. Such pipes have significant advantages:
- A large selection of sizes allows you to choose the material for any metal construction.
- Standard sizes facilitate the jointing of parts.
- The uniform thickness of the tube allows for a reliable joint.
- Smooth product surface.
- The weight of the pipe is less than that of all-metal rolled steel, the structure from it turns out easier.
Before welding profile pipe, it is worth considering the advice of professionals on the technology of the work. To weld steel pipes are used known types of welding: arc, gas, contact and semi-automatic. Let us consider in detail how to weld profile pipe by each of the above methods.