How to cut a hole for the sink in the countertop? Wood drilling and particle board.
Plywood (and to a lesser extent other sheet materials such as particleboard or oriented strand board) is an extremely decorative material. With a simple enough tool and certain skills, you can cut almost anything out of plywood. But in order for the resulting parts to look presentable enough, the craftsman should have a few tricks in reserve. It is about them we will talk in our article.
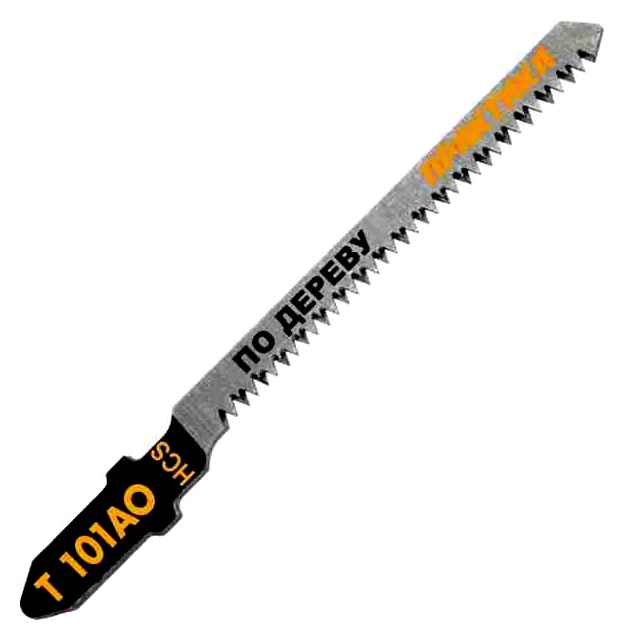
Beginning to work with sheet materials, many craftsmen have only an idea of how to perform a straight line sawing. Therefore, the question of how to cut an even circle from plywood, many may be stumped. And indeed, it is impossible to cope with the task with an ordinary or circular saw. Figured sawing is most often performed with the help of such tools:
- The simplest device that is used for sawing. With the jigsaw, even the thinnest work can be done with their own hands, but for thick material or long cuts it is practically not suitable.
- Jigsaws. Here you can use two varieties of devices: the usual, with a vertically positioned saw;
- Artistic, in which the role of the cutting element is a steel blade.
Normal electric jigsaws are useful when working with thick. But if you are looking for a way to cut letters out of plywood or to make other complex elements (e.g., parts of a child’s construction set), it is best to use a model with a band saw.
Tip! Naturally there are several varieties of jigsaws and blades for each type of jigsaw. The right choice of cutting element is a prerequisite for high quality products.
- In addition to jigsaws for curved cuts, you can use a furniture router. Despite all the difficulty in operation, it is many times superior to most models of plywood saws in terms of the quality of the holes it makes. With a router we can.
Also do not forget about improvised devices, but about their use we will talk in the appropriate section.
Cutting from plywood has several nuances that the craftsman must take into account:
- First, you can saw only on a dry material. High humidity increases the resistance of the veneer, so excessive force will either begin to delaminate the veneer or the saw will break.
- It is necessary to change the saw or the cutting blade immediately after the first signs that the teeth have blunted.
- If we cut plywood with a jigsaw, we want to obtain cleaner edges by placing the main cutting lines along the grain of the veneer. But it is easier to work across the fiber with a hand saw: there will be more chips, but there is less risk of jamming the saw or its deviation from the planned line.
Tip! When transferring drawings for cutting from plywood to the workpiece, try to place the template in such a way that the elements to be removed fall on areas with defects: knots, chips, stains, etc.д.
Cutting Tips
Choosing a tool
Beginning to work with sheet material, many craftsmen only have an idea of how to perform a straight line sawing. That is why the question of how to cut an even circle from plywood may confuse many people. And indeed, an ordinary or circular saw will not do the job. Figured sawing is most often performed with the help of such tools:
- Hand jigsaw. The simplest tool used for sawing. With a jigsaw, even the thinnest work can be done with their own hands, but here for thick material or long cuts, it is practically not suitable.
- Electric jigsaws. Here you can use two varieties of devices: an ordinary one, with a vertically arranged saw blade;
- Artistic, in which the role of the cutting element is a steel blade.
Normal electric jigsaws are useful when working with thick plywood, for example, when making a bed with your own hands. But if you are looking for a way to cut letters out of plywood or make other complex elements (for example, parts of a child’s construction set), then it is best to use a model with a band saw.
Model for scroll sawing
Tip! Naturally there are several kinds of jigsaws and blades for each jigsaw model. The correct choice of cutting element is essential for high quality workmanship.
- In addition to jigsaws, a furniture router can also be used for curved cuts. Despite all the difficulty in operation, the quality of holes it produces is many times superior to most models of saws for plywood. With the help of a router, you can make a wonderful rocking chair out of plywood sheets with your own hands.
Also do not forget about handy tools, but we will talk about their use in the relevant section.
Tips for cutting plywood
Cutting from plywood has several nuances that need to be taken into account by the master:
- First, you can only saw on dry material. High humidity increases the resistance of the plywood, so excessive force will either start to delaminate the veneer or the saw will break.
- It is necessary to change a saw or a cutting blade as soon as you see the first signs of bluntness of teeth.
- If we cut out plywood with the jigsaw, then in order to get cleaner edges the main cutting lines should be placed along the fibers of the veneer. But it is easier to work across the grain with a hand saw: there will be more chips, but there is less risk that the saw jams or moves away from the planned line.
Saw for rough work: the edges of the product will need to be ground with a file
Tip! When transferring drawings for cutting from plywood to the workpiece, try to place the template in such a way that the elements to be removed fall on the areas with defects: knots, chips, stains, etc.д.
Articles, Schematics, Manuals
Often, when repairing or installing various wooden products, you need to drill a perfectly round hole. In this article, we will try to cover all the ways in which you can cut such a hole. Options with and without special tools will be discussed. A hacksaw with a very narrow blade, a jigsaw, a boring saw, and a circular file are hand tools that can be used to cut through a curve.
Wait until all bases are searched.When finished, you will see a link to access what you’ve found.
Jump to search results
Watch this video : How to cut a round hole in thin metal without special tools.
How to make a round hole in a particle board?
I have a couple of columns to make, but I still haven’t learned how to saw straight with a jigsaw. Fiolent is stable in this regard. With what you can make a hole for the speaker with a diameter of about cm. With a circular jigsaw!
But I do not know whether there is such a device for the Chinese. With a cutter, with a similar device if you have a cutter. Actually, it’s easier with a jigsaw. Only take a new saw and cut without a strong feed. If you have a milling machine, you can use it. It comes with a special lever for circular cuts. And get a small finger drill. You mill it halfway on one side and then the other half on the other side. There are also special circular attachments for the drill.
For 25 cm will suffice. But it needs a good support for the drill, a stand is better. Again, if the chipboard is wide, you may not have enough depth of cutter. Then we can try it from both sides. And actually making good speakers is a great skill, in t.
I meant what you said. “and a jigsaw straight sawing has not learned. Making for myself, so any will be good. No router. Where to look for them, the approximate cost. Such circulars are called “attachment for cutting holes of large diameter,” or drill jigsaws for drilling holes of large diameter. In short, it’s a special sleeve with a shank for the drill and a cone for alignment.
There’s a hole across the bushing where you put the long rod. At the end of this rod there is a rectangular hole for the cutter with a screw to tighten it. The diameter of the hole is adjusted by the position of the rod in the sleeve. You set it and fix the rod in the sleeve with a clamping bolt.
And then you drill. We have seen such devices more than once at construction markets. That’s where you should look. This is not homemade, someone makes them on an industrial scale. If you need to make a neat sampling for the recess flange of the heads that is correct, and for the HF it is a must. it’s probably only with a router. As for the front panel, take good advice from Nickel. Also, in the body itself does not hurt and spacer.ki. Especially if it is big, and the walls are thin, and cover the vibration and sound absorbers Did this.
I tried it with a jigsaw and it’s terrible. Took a milling machine, made a fixture in 20 minutes and cut through. with a recess for the flange. Thanks again!! And when this circular for the drill rotates. it does not hit? Because the eccentric 2 Nickel. I do not want to buy fiberboard. There’s fiberboard. I was thinking of building a box. I coat the front part with auto paint “anti-noise and so on” and glue another sheet on top of it. But then the speaker would “sink”. And about the jigsaw. for some reason the jigsaw drives so and it’s Roebuck. I have to pull the jigsaw hard to the left.
It comes out on the line, but the saw bends and you get a chamfer of 40 degrees. Tavrovod wrote: And about the jigsaw. for some reason the saw is running so and it Ryobir. you have to pull the jigsaw hard to the left. Desti wrote : No. Anything at all?? Or all the “Calibers” and other Chinese? Or Chipboard is a thick material? I haven’t noticed anything like that with my jigsaw! IMHO A good jigsaw and good saws are the key to success! On a non-thick board, yes. But try your jigsaw to cut a piece of 4 cm. And if the saw is already running and a little undercut, you don’t even have to try.
Desti wrote : On thin boards yes. Beech is mm, I will try it with the DP saw. But if it’s always one way to the left. the material most likely has nothing to do with it! It’s unlikely that Tavrovod always saws 50mm oak or beech. I have a 18 mm sawblade glued to the front wall of my column. I tried it on scraps, I couldn’t get an even cut, the saw just takes off instantly. To make a jigsaw stem absolutely without backlash, and a saw with a strictly symmetrical sharpening, is unreal.
Adding up, these two factors, plus the unevenness of the density of the material, different density layers or the structure of the layers of wood and lead to sagging. Desti wrote : I have an 18 mm thick column front panel glued together. I’ve tried a green bosch, philent, skeleton, makita, different saws. In the end I bought a router, because no one had it, and I had to make a hole.
Desti wrote: I’ve tried Bosh green, Fotom, Skeel, Makita, different saws. I sawed Soviet chipboard 15 mm and plywood about 8 mm. Mine takes it away. Fiolent doesn’t. I mean, I can feel with my hand that the jigsaw wants to go sideways.
Check the geometry of the jigsaw. Maybe the saw’s just looking sideways from the start. Try a new coarse cutter, it has a wider rake angle, it’s easier for the jigsaw to move along the arc. And the feed d. And the drill of course beats, you can not hold in your hand, especially with such a thickness. All you need is a stand. I wonder if the panel will fit under the post? A router, of course, is ideal Making quarter-circle shelves in an oak corner with a router.
Broke a 6mm Chinese finger cutter, the splinter flew out and caused a lot of unpleasant experiences. After that went this way.
I first use a router with a compass to get a mm out of the groove. Then I cut the required contour with the jigsaw and the saw goes inside the groove with a reserve, t.
Then I go over the edge of the finished part with a mill with a bearing, the bearing rolls on the former edge of the groove. Desti wrote : To make a jigsaw stem absolutely without backlash, and a saw with a strictly symmetrical sharpening, is unreal. When I made a sub in the car, then in plywood 18mm without problems made a hole for the 12″ speaker is mm or so with a jigsaw with a coping device a la scraper.
And when I did the same for the mm speakers, there was some drift. The plywood was even 12mm thicker, but the jigsaw and saws are the same. But now I’m going to use 25mm Fiberboard and a router for my home speakers. For a quality round hole. only the cutter. And the lead. Forum Blogs Video Market Ranking Masters.
New Posts New Topic Albums Popular Tags Specials. Join the Mastergrad Community Sign Up. Forum Tools and power equipment Power tools: instructions, repair, use How to make a round hole in the chipboard?
How to make a hole in wood without a drill bit?
You can use an ordinary gas torch and an awl for this. Heat an awl red with a torch and gently pierce the plastic. You get a straight hole in the plastic, which is quickly done without a drill. Instead of an awl you can use a nail clamped in pliers.
Ballerina drill. Circular adjustable drill bit with cutters. Designed for drilling large diameter holes in wood, plywood, particle board. The center spiral drill bit is used for pre-drilling into the material, while the sliding sharp bits cut a groove in the material around.
With what to cut a hole in the board?
The jigsaw needs a drill with a wood bit to insert the file into the board. If except for a small diameter wood drill and an electric drill there is nothing else, it is possible to drill a large diameter hole with it. We outline a circle on the board of a larger (desired) diameter.
- bit with a bit holder
- bit with a carbide tooth
- Forstner’s drill
- wood cutter (a common name for it is “ballerina”)
- feather drill
How to cut a circle in plywood without a tool
Usually, in order to saw out of a piece of plywood or board an even circle, masters resort to all kinds of routers, use jigsaws manual or electric, and, at the worst, take a hacksaw. And meanwhile, using a simple device, you can also cut a perfectly straight circle with a circular saw. Read and see how to do it in practice in the detailed step-by-step instructions. Before you cut a straight circle with a circular saw, take care to have the right materials. You don’t need much of the latter:. Take a meter and measure the depth, length and width of the gutter on the circular saw table. Using these cutting parameters, cut a suitable thickness out of a piece of plywood. Step 2.
Jigsawing plywood is much easier than, for example, carving wood. Therefore, to achieve good results, you do not need years to master the skill. All you need to do is work very carefully, following the recommendations above.
Usually, in order to saw out of a piece of plywood or a board an even circle, craftsmen resort to all kinds of routers, use jigsaws manual or electric, and, at the worst, take a hacksaw. And meanwhile, with a simple device, you can also cut a perfectly even circle with a circular saw. How to do it in practice, read and see in a detailed step-by-step instruction.
Before you cut a straight circle with a circular saw, make sure you have the right materials. You will need very few of the latter:
Take a meter and measure the depth, length and width of the trough on the circular saw table. Based on the obtained parameters, cut a suitable thickness out of a piece of plywood.
Insert the timber into the chute and adjust the edges if necessary. The bar should slide easily along the trough without catching it.
Leaving the bar in the gutter, put a square piece of plywood on top of it. Install it so that it does not interfere with the saw itself.
Screw the plywood firmly to the bar with self-tapping screws. Pay attention to the length of the fasteners when choosing them. Do not screw the screws in to damage the table surface.
Take a piece of plywood or board from which you need to cut an even circle. Adjust it to the shape of the square. Place the plywood over the prepared construction and hammer a nail exactly in the middle. Do not hammer the nail all the way in. Plywood, from which it is necessary to cut a circle, should be free to rotate, and the nail itself at the end of the work will need to be carefully taken out.
While rotating the square in a circle, cut off its corners so that you have an octagon.
Continuing to rotate the square and further, cut off its sharp corners. At the end of the work carefully sand away any small irregularities. So, without unnecessary effort you will get a smooth circle cut from the board with an ordinary circular saw.
When working with different types of wood it is always necessary to know the detailed variations of its treatment. Before you cut a circle in plywood, you need to know all the options, because you often have to adjust to the situation. There are many options for performing such a venture, and they differ dramatically.
In order to cut a circle out of plywood, you can use both professional tools and improvised means.
The perfect circle with a jigsaw
Plywood, unlike other sheet materials, thanks to its dense and not loose structure, lends itself to easy sawing and obtaining from it various decorative complex shapes. With a standard set of tools, any home master is able to cut from this material any desired, and even complex elements. However, in order for the workpieces to have a marketable appearance and not to violate the conceived element of the decor, you need to take into account some nuances on working with plywood. How to cut a straight circle out of plywood?
Usually, in order to saw a straight circle from a piece of plywood or a board, craftsmen resort to different kinds of routers, use manual or electric jigsaws, and, at the worst, take a hacksaw. And meanwhile, with a simple device to cut a perfectly straight circle can also be cut with a circular saw. How to do it in practice, read and see in the detailed step-by-step instructions. Before you cut a straight circle with a circular saw, take care to have the right materials. You only need a few of the latter:.
What is a wood ballerina
The adjustable circular “ballerina” drill bit is a device for drilling round holes of large diameters. The design of the tool is simple. It consists of a shank with a transverse rod, on which movable tool carriages are mounted. The rod has a marking on which you can set the required tool spacing relative to the center of the intended hole. In the middle of the toolholder there is a core drill. It serves as an alignment and support for drilling.
1) with an angle grinder. This method is best used when you need to cut a large diameter hole. Proceed according to the following algorithm:
a) Use a marker to mark the contour you want to cut.
b) Install a special nozzle on the angle grinder, which is designed to work on dry surfaces.
c) Start cutting. Note that the process of cutting the hole must start from either edge of the tile.
d) Do not interrupt when making the cut. It is not recommended to continue on the opposite side. In this case, the cutout will be uneven, i.e.к. The lines may not come together.
2) with the jigsaw. This tool is convenient to work with when cutting a hole for the socket. This cutout does not have to be straight. It will still overlap the socket. There are a few tips that make the task easier:
- Mark the cutout borders on the tile.
- Often the marked outline coincides with the edge of the tile. In this case it is recommended to immediately treat the tile.
- Then proceed to cut a circular hole. This procedure is carried out along the inner contour of the marking. In this way, it is possible to comply with all dimensions.
Some additional information! If you follow the above rules, you can also cut a hole in the tile using a hacksaw. However, it is worth bearing in mind that the use of this tool will have a negative effect on the end result. The cut may be crooked.
Tool functionality
A quality beamer is made of high-strength steel, which makes it possible to use the device in work with soft, as well as with hard types of wood.
This tool has an adjustable drilling diameter. This allows you to make holes of almost any diameter. The limit of the drilling range depends on the size of the ballerina. Manufacturers produce fixtures with the following cutter spacing limits:
The maximum diameter of the cutter is limited by the tool’s mounting bar. Minimum. thickness of shank.
The ballerina drill can be used in any location where the use of an electric jigsaw or hand router would be inconvenient. For example, it may be assembled and installed furniture, in the details of which a neat hole must be drilled, given the limited space. Another example is the uneven (concave or convex) surface. The jigsaw or router is unlikely to cut everything smoothly and accurately. It will be difficult to control the inclination of the tool relative to the surface. A ballerina can easily handle such a task.
How to cut a hole in paper
If you want to cut a hole in the paper, it is logical, of course, to use a box cutter. But there is a more technically safe way: you can cut through the hole with scissors. But in this case there is a nuance: the paper will have to bend.
So, let’s say we need to cut a hole in a bagel. We bend the edge of the workpiece to the edge, but do not “crimp” it, and notch in the middle of the hole depicted.
We straighten the workpiece, put the blade of the scissors into the slot, and cut the hole.
Caution: do not try to cut along the line of the hole bent workpiece (as cut symmetrical figures), in this case, for quality results should act our way: the most proven way, it has never failed.
It’s been a year, and I’m convinced I need more explanation on this subject, so I’ll continue. The thing is, children understand the idea of cutting a round hole very well. It’s easy to bend in half, make a slit, and go! But, if the hole is NOT round, how to proceed?? Such pretzels, for example, make even second graders cringe.
A pretzel with holes of arbitrary shape
But really, you have to proceed as before. We bend approximately in the middle:
Aim and make the cut so as to hit in the middle.
We go into the slot and cut along the contour line. And with the second hole we’ll do the same: Children are very confused by the idea of making a cut into an asymmetrical shape, so they need to develop their imagination, to see if the cut goes beyond the outline. It’s good for us, it trains our eye and our imagination.
How to cut a hole in the paper told you Marina Novikova.
Tags: practical tips, working with paper
Inserting the sink into the worktop
The sink in the countertop is installed. The plumbing fixture can be used.
Installing the sink and connecting the communications
To the bowl is mounted a drain and, if provided by the design, a faucet (water faucet). All the gaskets are installed in the right sequence. Usually the layout of the gaskets is indicated by the manufacturer on the packaging of the mixer and drain trap. Threaded connections are well tightened with wrenches or an adjustable wrench if necessary.
When buying furniture for the kitchen with such a surface, it is desirable to have a ready-made product, which will only require connection to the water and sewage system.
If there are no holes in the structure, on which the installation is planned, for the water supply and sewerage, they should be cut out. They are made in the same way as for the sink. Drill a hole and saw out the required size with an electric jigsaw. You can use a drill with a special drill bit. a furniture drill bit, just take the drill bit with the required diameter.
For this purpose the sink is used as a template.
Apply the sealing tape supplied with the product to the sink. A small gap is left from the edge, which is subsequently filled with sealant. Install the fasteners.
Some sink manufacturers and producers enclose a template with the product itself.
Reapply sealant in the points of contact and let it dry a little, 2-3 minutes. Install the product in place and tighten the fasteners. The countertop together with it to fix in its place and conduct the connection of water hoses. Connect the drain. Once again go over the joints with sealant, the excess must be removed.
Before sawing the hole for the sink in the worktop, draw a line under the holes provided.
Milling without chipping
At the exit from the material the tooth of the saw blade or cutter often forms chips. in wood, plywood or Laminated chipboard. The most common way to fight this phenomenon is to have the cutting tooth protrude from the material inside the groove. For example, by moving the workpiece in the direction of the disc rotation. But it is strictly forbidden to use this method for full-depth grooving. The energy of the rotating cutter is sufficient to tear the workpiece out of your hands. Then the workpiece flies with great speed in the direction of rotation. The consequences could be very unpredictable!
But still this principle is used in some cutting machines Laminated chipboard. Only in them the disc, which rotates in the course of the material feed, makes only a shallow cut. When it is formed, the effect of the scoring blade on the workpiece is negligible, so the work is safe. Behind the undercut is the main working disc, which rotates against the workpiece feed, as it should. The saw blade cuts the material cleanly, without chipping, because a shallow groove is already selected (the cutting tooth exits the material inside the groove). This is the principle I use in my work. For those who decide to try my method, I want to remind that the milling machine, installed in a table. is a tool of increased danger. And when working with it I must strictly adhere to safety rules. use protective shields and hold-downs, and not allow exceeding the recommended feed rate and RPM of the cutter. The table should be free of foreign objects and well lit.
If you put the groove cutter on the router and miss the workpiece, chipping is sure to occur!
So I first clamp the plywood overlay to the routing table rail so the cutter only protrudes 2 mm beyond the surface of the overlay. And then I guide the workpieces in the direction of the cutter rotation. This produces a shallow groove without splintering.
Then I remove the overlap. now the cutter protrudes to the set depth. And I feed the workpieces toward the rotating cutter as they should be.
Below are other entries “How to make with your own hands. housewife!”
- Choosing drill bits for hard and brittle materials What drill bit is needed for drilling.
- How to repair holes for shelf supports by yourself Repair of shelf supports with your own hands (holes.
- Drilling mini-machine with their own hands How to make a drilling machine For.
- Drilling from A to Z (drills, metal, wood, stone and plastic, etc.).) Drilling for beginners Always when you need to.
- Dust collector for drilling with their own hands. photo Dust collector for drilling walls with their own.
- Dryer heater with their own hands (photo scheme) How to make a dryer heater with their own hands.
- Frame for volumetric objects (COLLECTIONS) with their own hands. photo and master class A beautiful frame for volumetric objects.
Let’s be friends!
With their own hands Carpentry How to drill without chipping
How to sharpen a wood drill bit?
Drills may wear out and need sharpening if used extensively. It is possible to bring a wood drill bit back to sharpness on its own, but it requires some skill. Maintaining the sharpening angle is an important moment, without which it will not be possible to restore the quality of the drill. Wood core drills are made of soft metals, and they can be recovered with hand tools and jigs, and tools are used for this purpose:
Most of the technical community believes that it is still a drill bit. Nevertheless, manufacturers persist in calling this tool a square hole drill, a Watts drill, or a drill whose profile corresponds to the Rhelo triangle.
What is more correct? If we refer to the kinematics of the movement of such a cutting tool (for clarity, you can use the diagram in Fig. 1, you may find that the metal will be removed only by the side surface, and the cutting planes will not be one, as in a conventional drill, but four, which is more characteristic of milling cutters.
However, one rotary movement alone will not be enough to produce a square hole. Simple mathematical calculations (not shown in this article) show: In order for a “drill bit” for a square hole to perform its function, it must describe during operation not only the basic rotation motion of the cutting edge, but also a rocking motion of the drill bit/milling cutter around some axis. Both movements must be made in mutually opposite directions.
Figure 1. Relo triangle: a). construction; b) rotation sequence to obtain a square shaped hole.
The angular velocity of both rotations is determined quite simply. If we take as parameter f the rotational speed of the shaft of the drill (or of the rotary table), then a speed of 0.625f is sufficient for the oscillatory rotation of the spindle around its own axis. In this case, the spindle axis is as if clamped between the drive shaft and the drive wheel, forcing the drill bit/milling cutter to oscillate in the clamping fixture at a residual speed
The resulting speed of the cutter can be set more accurately using the specifications of the drill/peeler, but it is clear that it will be much lower than the one for which the tool was originally designed. Therefore, obtaining a square hole will be less productive.
How to choose the right one and what to pay attention to
Choosing a quality circular drill bit is quite easy
The main thing is to know the main points to pay attention to first of all, but also not to disregard the details
Design, a very important point: wood ballerina comes with one cutter or two or more. For frequent use it is better to buy a variant with two or three cutting elements. Such tools are easier to work with and the quality of the work performed will be at an acceptable level.
It is not superfluous to be able to replace individual parts. Inexpensive circular drills may have a solid shank with a fixed central drill bit and drill bar.
Metal, its quality determines the strength and ability to withstand work loads. High-quality tools are made of high-strength steel or alloys. Machine tool tools are shaped in the shank and toolholders. The boom is usually stamped and made of the same metal.
Cheap versions often use soft metal or alloys that can prove brittle. Parts can deform or break under load. Such a tool will not last long and accuracy is also difficult to achieve.
Quality of workmanship, the main sign is the absence of backlashes and misalignments. All parts must fit together and be securely fastened by securing screws.
The marking of the bar of a quality ballerina is stamped. Sometimes the graduations are highlighted with bright paint for better visibility.
Cutters, quality cutting elements are made of tool hardened steel. They can be attached to holders by riveting or soldering. One-piece cutters with holders (made of the same metal) are quickly blunted and have no durability.
Manufacturer, when choosing any tools and consumables, preference should be given to well-known and long-proven brands. The most common are Topfix, Stayer, Irwin, Strum.
Purchase of adjustable circular drill bit for household use, or in case of need to drill several holes, is fully justified. It saves you from buying expensive tools that you might need just a few times.