How to saw a furniture board without splitting. Sawing Laminated chipboard at home. Selection of circular saw blades and saw blades
You will also need additional tools for sawing:
Cutting Laminated Chipboard is done in the following order:
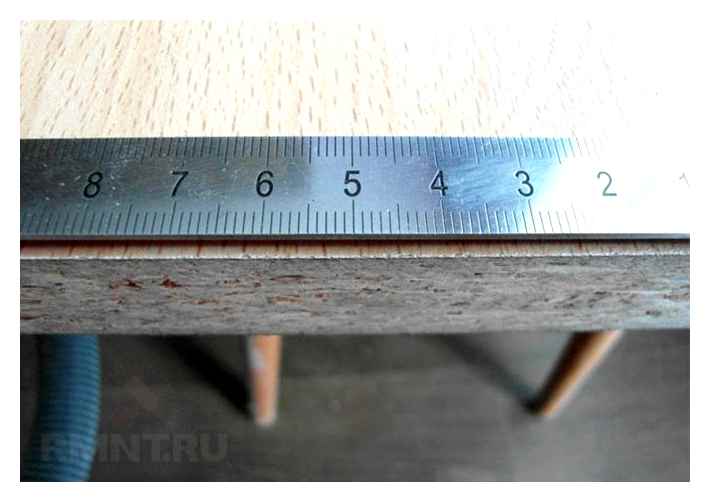
- Marking the material. A ruler and pencil will be needed to mark out the blanks to draw dots on the sheet of material from the end. Then the points need to be joined evenly into one trimmer line and tape the top with painter’s tape. A good way to cut Laminated chipboard without splintering is to use tape, i.e. к. It helps reduce the number of cracks in the panel material that can occur due to excessive heat and pressure. Sawing laminated chipboard.
- Then the sawing process Laminated chipboard. We choose how to cut the chipboard, and put the tool at the required angle to saw the edges of the board flat. Sawing Laminated chipboard and fiberboard should be done very carefully and as smoothly as possible.
- Plate processing. If the sawn particleboard at home uneven from the ends, which were cut, they are treated with a belt sander. In some cases, it is better to immediately contact a company that provides services for the production of furniture parts to order by customer size and sawing Laminated chipboard on special equipment. To laminate parts, a special laminating edging strip is used for edging.
Precision and quality
The panel cutting machines for sawing Laminated chipboard and particleboard have a high cutting quality, which reduces the post-cutting costs (sanding, chipping, deburring, etc.). That’s why such machines can be used for cutting any complexity and configuration, and that means almost limitless possibilities in furniture production. Fancy children’s furniture, comfortable computer desk tops, carved curved decorations in the doors of kitchen fronts. all this is possible with these machines.
Panel cutting machines come in two varieties:
- Vertical: a solid, robust and vibration-resistant welded base (frame), vertically mounted at 50° to the rear, with rails at the top and bottom on which the saw unit runs. It is a bracket for the saw unit, which moves down and up along the beam, and also rotates 90°, which allows you to make both vertical and horizontal cuts. The precision of the cut is amazing. Sawing laminated chipboard, as well as hard, corrugated or porous boards requires a special scoring unit. The frequency of the saw rotation reaches 15 thousand revolutions per minute;
- horizontal, consisting of a table for the plate, a carriage to move the saw along the saw mechanism, and the saw mechanism itself, consisting of one or two cutting units. Cutting units are equipped with a main saw and a scoring saw. The principle is simple: the main saw cuts deep into the chipboard and the scoring saw precisely and accurately cuts the bottom edge (veneer or laminate surface). The sawing units can also be tilted by up to 45°.
The mitre saw is an homemade and greatly reduced copy of a horizontal panel saw. It doesn’t cut wide sheets of particleboard or laminated chipboard, but it can handle small parts.
How to saw chipboard without splitting
In order to saw evenly and chip-free laminated chipboard at home, you need to know a few tricks. Without a doubt, it is better if you saw with an electric jigsaw. Of course, you can also saw with a hacksaw, but the result is unlikely to please you, although it is possible to saw chipboard for various purposes, where the quality of a cut does not play any role. And so, we need a smooth and beautiful cut. For this we take a jigsaw, a ruler, a tape measure and an angle bar for right angles (if it is necessary), an awl or a sharp object with which to draw a line for a trimmer on the laminate on the chipboard. We measure a part that will be sawed off with a reserve of 1-2 mm for further adjustment and attach a ruler, on it we guide with an awl or a sharp object a fishing line for a saw trimmer, try to press harder to cut through the laminate, and we saw along the line not along the line itself, but exactly along, only catching it with the edge of the saw.
Then with coarse sandpaper bring the edges of our saw cut to the right condition, and if you are not satisfied with the quality of the sawn end, take a wax chalk of the desired color t.е. in the color of particle board and grind up the chips. Let’s talk about jigsaw blades. Personally, I use BOSSNEW.
If you need to saw without chipping only one side, you can use saws as a tooth up and down, I use a small saw with a straight tooth they shear less and cut both sides pretty decent. It’s easier to machine the beveled end with emery paper if you drape it over a flat bar. Furniture wax crayons and markers you can buy in furniture stores, where they sell fittings. If you can’t find a crayon in the color you want. No problem. you can make it from several others, mixing it like paints. Simply melt crayons with a candle and drop on a plate, one color on it another, then roll into one and rub the edges with chips, remove the excess with a ruler or knife and polish rag gently, strongly press it is not necessary.
How to saw Laminated chipboard without chipping.
Before we speak about the absence of chips when sawing Laminated chipboard and making a decision what to saw with, let’s define what it means without chips? Each in his own way refers to the number of them after the sawing, to some it is a lot, and for someone and a dozen just right. That’s why let’s consider not one, but three types of home cutting Laminated chipboard available, from which you can choose the most suitable one. For obvious reasons we will not consider the use of expensive equipment designed for sawing laminated chipboard, this is the destiny of professionals. We are still amateurs in the furniture business and therefore we will use the appropriate tools.Here are three parts, the top one is sawed with an electric jigsaw, the middle one with a hand held circular saw, and the bottom one also sawed with a hand held circular saw but then trimmed with a hand router. Of course in each case you can achieve different results, it all depends on the experience and skill. But in general the possibilities of the considered equipment give approximately such results on chipping on the Laminated chipboard.
In this case, three things allow you to get more or less good sawing results.
- Guide. It is not necessary to play with the electric jigsaw guide. An ordinary building level and two clamps will do.
- Choice of jigsaw blade for laminated chipboard. The saw cuts the laminated layer and the particle board itself with teeth, and accordingly the shallower is the tooth, the shallower are the chips. And the sawing speed is appropriate. The upward or downward pointing of the tooth only tells you which side of the workpiece will chip more, the first at the top and the second at the bottom.
- Control over sawing speed. If you feed the jigsaw too much, the saw blade will bend and move aside and the cut will not be perpendicular to the plane of the workpiece. After such sawing one would not dream of gluing an edge.
Now let’s consider whether it is necessary to “scratch” the laminate layer. It may help, but only if the following conditions are met. As the saw forms chips not only on these layers, but also on the outermost layers of the chipboard, it is accordingly necessary to “scratch” them too. The width of the “scratched” line must exactly match the thickness of the saw (if you make it narrower, it will stab, if you make it wider, it will leave a mark on the workpiece). The lines must be strictly above one another and the sawing must be done strictly along the line. Think about how realistic it is to do it at home with their own hands, and the answer about “scratching” will be obvious.
Sawing laminated chipboard with parquet.
The reason of splintering in this case is the influence of the cutting teeth, but not only in the direction of the kerf, but also from the opposite side. (The vibration from the power tool does not allow the parquet to be guided perfectly straight, which results in a skewed blade relative to the kerf). The guide in this case not only makes it possible to saw the chipboard smoothly, but also prevents chipping on the opposite side from the sawing direction. When choosing a disk for sawing laminated chipboard pay attention to the number of teeth, the more teeth, the cleaner the cut.
Before processing furniture pieces with a router, it is necessary to saw them with a reserve of 3-5 millimeters from each side to be processed. Unlike previous sawing methods, the hand router leaves behind a perfect cut surface. Chipping after such processing is rare and it turns out to keep the cut perpendicular. Until now we have considered only straight sawing, but when it comes to sawing various kinds of circles and roundings, there is no alternative to the jigsaw and milling machine. The disadvantages of using the cutter can include the need for skills to work with him. We will talk about them in other articles.
How to saw Laminated chipboard without splinters.
Before we talk about no chips when sawing Laminated chipboard and deciding what to saw with, let’s define what no chips means? Everyone has his own attitude to the number of them after sawing, to someone a lot, and someone and a dozen just right. That’s why let’s consider not one, but three available home cutting types Laminated chipboard, of which you can choose the most suitable. For obvious reasons, we will not consider the use of expensive equipment designed for sawing laminated chipboard, this is the destiny of professionals. We are fans of the furniture business yet and therefore we will use the appropriate tool.In the picture three parts, the upper one is sawed with an electric jigsaw, the middle one is sawed with a hand circular saw (parquet) and the lower one is also sawed with a hand circular saw but then trimmed with a hand router. Of course, in each case you can achieve different results, it’s all about experience and skill. But in general, the capabilities of the equipment in question give approximately these results on chips on Laminated Woodchipboard.
In this case three things allow to get more or less good result of sawing.
- Guide. Wise up with the guide for the electric jigsaw is not necessary. An ordinary building level and two clamps will do.
- Choice of jigsaw file for laminate Particleboard. The file scratches the laminate and the particleboard with its teeth, and the finer the tooth, the finer the splintering. And adequate sawing speed. The direction of the tooth upwards or downwards indicates only which side of the workpiece is more chipped, the first from the top and the second from the bottom.
- Control over cutting speed. If you feed the jigsaw too much, the saw will bend and move the kerf to the side, and the kerf will not be perpendicular to the plane of the workpiece. You wouldn’t dream of gluing an edgebanding after sawing like that.
Now let’s consider whether it is worth “scratching” the laminate layer. It might help, but only if the following conditions are met. As the saw forms chips not only on these layers, but also on the outermost layers of the chipboard, accordingly it is necessary to “scratch” them too. Width of “scratched” line must exactly match the thickness of the saw (if you make it narrower it will stab, if you make it wider it will leave a trace on the workpiece). Lines must be strictly on top of each other and it is necessary to saw strictly along the line. Think about how realistic it is to perform at home with your own hands, and the answer about “scratching” will be obvious.
Sawing laminated chipboard with a parquet.
Chipping in this case is caused by the cutting teeth, but not only in the direction of the kerf, but also on the opposite side. (The vibration of the power tool can not drive the parquet block perfectly straight, resulting in misalignment of the disk relative to the kerf). The guide not only enables the chipboard to be cut cleanly, but also prevents chips on the opposite side to the sawing direction. When choosing a disk for sawing laminated chipboard pay attention to the number of teeth, the more you have, the cleaner the cut.
Before machining furniture components with the router, it is necessary to saw them out with a reserve of 3-5 millimetres on each side to be machined. Unlike the previous cutting methods, the hand-held router leaves behind a perfect cut surface. Chipping after such workmanship is rare, and it is possible to keep the cut perpendicular. So far we have considered only straight-line sawing, but when it comes to sawing various kinds of circles and roundings, there is no alternative to the jigsaw and router. The disadvantages of using a router include the need for skill in working with it. We will talk about them in other articles.
Why are splinters created?
Before you cut Laminated chipboard or laminate with an electric jigsaw, it is desirable to understand why chips form when cutting sheet material. And the answer is simple: everything lies in the design of the jigsaw, or rather in the design of the file.
So, during the cutting process the file is moving backwards (up and down). And if the saw moves in the direction of the teeth (usually downward), there are almost no chips, when moving the tool in the opposite direction, the teeth as if ripping out the upper layer of the material, thereby forming an unpleasant splinter. That’s why you can observe an almost perfect cut on the underside Laminated chipboard and a chipped cut on its upper edge.
Ways to minimize chipping
An additional cause of splintering can be the separation of the file teeth. That’s why the first thing to do is to buy straight (often Bosh files). However, it should be noted that with prolonged work, such saws overheat and can even bend in the process of cutting. Because of that pauses in work are necessary for the cutting tool to cool down.
However, one saw blade replacement is not enough and in order to cut Laminated chipboard (laminate) with an electric jigsaw without splintering it is necessary to make some fine-tuning of the electric tool. Namely to make sure that when the saw moves against the inclination of the tooth the material does not tear out. For which it is sufficient to make a thrust pad. This is the conclusion you can come to after trying to cut two sheets of laminated chipboard at once Laminated chipboard. There are very few splinters on the lower panel.
In order to make a landing pad for the jigsaw, it is enough to saw a rectangle of any dense material (for example, laminate) with dimensions identical to those of the base of the power tool.
Then an overcut should be made along the greater axial line and the obtained tooling should be fixed to the jigsaw foot with insulating tape or double-sided adhesive tape. All finishing is ready and it is possible to perform finishing works with observance of certain recommendations.
The correction of splinters that have appeared
Any master should know not only how to saw with an electric jigsaw without chipping, but also how to fix if they still appeared, because it is almost impossible to avoid them.
There is a way out. The tool cuts the workpiece with an allowance of about 2 mm, then the allowance is ground with a belt sander or milled. In the latter case, the edge is much cleaner than after processing with a grinder. Milling mainly on a self-made tire. Spiral cutters increase the quality, they should be prepared 2 pieces. If you need to get a clean one face side, use an ordinary 2-pass cutter, both sides. a 4-pass cutter with 2 main branches, which have a left direction, and 2 undercutting with a right direction. In this case, when you cut the workpiece, the lower branches pull the material upward, while the upper branches push it downward. No chipping of edges as a result.
Experts advise to use the backlighting of the working area to increase control over the direction of the cut. Saw metal boards, wooden kitchen countertops and other products with a device with a well-sharpened saw blade.
What to do if there are accuracy problems
Below we’ll look at how to cut evenly with a jigsaw and get an accurate cut.
Sawing with the saw table
Often circular or oval elements have to be sawed with the jigsaw. You need a circular saw table. On the underside of the worktop the jigsaw needs to be fixed upwards. Latch start and stop buttons at the side. You just have to move the material in the right direction.
Sawing with the guide rail
The guide rail is like a long ruler 1.3-1.5 m. A groove is made in it and the jigsaw moves along it. The jigsaw must be adjusted to the cutting line and the guide rail must be clamped. The tool must be guided precisely along the guide rail when sawing.
What to do if you have accuracy problems
Below we will look at how to cut evenly with a jigsaw and get an accurate cut.
Sawing with the saw table
It is often necessary to cut circular or oval elements with the jigsaw. No need for a saw table. On the underside of the table top you need to mount the jigsaw upwards. Secure the start and stop buttons on the side. It remains only to move the material in the desired direction.
Sawing with a guide rail
The rail looks like a long ruler 1.3-1.5 meters. A groove is made in it and the jigsaw moves along it. The saw has to be adjusted to the cutting line and the guide bar has to be secured with a clamp. When sawing, the tool should be guided strictly along the guide bar.
Drill-saw
Neither a hand saw nor an electric hacksaw will help if you have to saw a small hole with a diameter of less than 10 cm in the workpiece. The jigsaw may also be useless if the workpiece is large. In this case the most suitable tool is a boring saw. With its tip it plunges into the wood like an auger and thus makes a “start” hole for further sawing. The shape of the saw is similar to that of a round file, the difference being that it has a cutting edge that goes around the core in a spiral pattern.
Drill saws are produced with interchangeable nozzles of different diameter, designed for processing soft and hard wood, as well as a variety of materials made of it.
The working organ of a hole saw is a metal rod with a cutting point like an auger, and a cutting edge that wraps around the rod in a spiral.
This is what the narrowest of the hand saws looks like. Thanks to the attachment unit, the blades in a hacksaw can be changed depending on the nature of the material being worked.
Drill bit
One of the most popular and convenient options for cutting a hole is a special nozzle on the drill. It is made in the form of a crown ridge and has a rounded shape. Holes can be drilled quickly and are precise enough with this bit.
The bits come in various diameters, so you can cut a hole with the desired diameter. If you have already prepared the hole, you might want to try your hand at the option trade.
Drill bit
Large holes can also be cut with a drill. For this purpose, it is necessary to mark in advance the contour of the drilled hole. Next, use a small drill to drill through holes on the contour, prepared in advance. Then, with a jigsaw or a very sharp knife, cut off the wells, thereby connecting the holes. After that you can smooth the circle with a sandpaper of different grit.
Chisel
It is also possible to cut out the necessary hole with a chisel. It is enough to remove the wood layer by layer along the contour. This option is the least suitable for interior design. The hole should be flat, which can not be achieved by using improvised and unfit for the job materials. The best option would be to use a drill bit. The hole should be straight and with smooth edges.
So, to summarize, it is clear that the choice of the tool for cutting the hole, it should be based on your goals. If a qualitative sawing is needed, you can’t do without a special tool.
Job performance
Once you have selected the saw, you still need to saw the laminated board correctly at home. Connoisseurs recommend sawing along a guide rail (a rail clamped in clamps will work as well). If you use a new, unworn blade, you can cut particleboard as cleanly as with a circular saw. It is advisable to run the jigsaw at the lowest RPM possible. This will greatly increase the life of each saw used.
Blades themselves are put at right angles to the jigsaw base. The easiest way to check the angle is with a square or protractor. Important: the straight line, passing through the cutting edge of the tool, must be parallel to the rigidly fixed part of the jigsaw. Use of special inserts is recommended, to reduce the risk of splintering. But to make them work more efficiently, it is usual to cut the laminated layer on the side where the blade will exit.
About how to saw laminated chipboard with a jigsaw without chipping, see the following video.
Laminated chipboard and the nuances of its processing
In order to saw a tabletop without splitting, a circular saw can be used.
In practice, particleboard only began to be used in 1940 in the United States, but after a very short time its popularity spread around the world, through which all kinds of varieties appeared. The most popular variety was Laminated chipboard, which is not only the product of pressing sawdust with glue under high temperature, but also an additional physical and chemical protection in the form of melamine film.
When sawing simple chipboard no complications can arise, but with laminated chipboard everything is much more complicated. Worktops are often laminated with HPL plastic by the manufacturer, which makes the process even more difficult. Coatings can vary greatly in their properties, but they are always polymer, which makes them have the same nuances in processing.