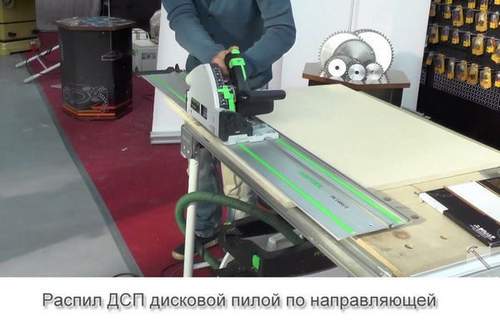
Today we will tell you what affects the quality of sawing, how to smoothly and cleanly saw off a chipboard, and also how to saw with a tire and without a guide with a conventional circular saw.
We will show by the example of a manual circular saw, but this does not affect the sawing techniques in any way, the difference is only in insignificant details. You can get a similar quality of cut on a cheaper tool if you follow our advice.
What affects the quality of cut chipboard?
In this case, we will saw chipboard, this is the most capricious material for sawing, because it has longitudinal and transverse layers, a rather delicate and thin veneer. But on the other hand, it has a rigid adhesive base, which will also interfere with us.
Saw blade. How to choose it?
When cutting a chipboard, the saw blade must simultaneously cut cleanly and be resistant, because the glue is very close to glass in its properties and quickly dies the tool itself. Therefore, in the process of sawing chipboard, you need to choose good enough disks to saw them without losing quality for a long time.
What is the difficulty of sawing with a circular saw with disks?
If we look at the cut of the workpiece, we will see that it is full of scuffs, because it is practically impossible to keep a saw in the cut “on hand”.
On the saw blade there is a difference in height between the body of the saw itself and the sawing part. the tooth. Due to this distance, the disc has the ability to direct its position in the cut. Accordingly, as soon as it changes its geometry, the rear teeth begin to crush over the workpiece from chipboard and leave traces on it.
It is important to place the workpiece face down. Why?
The disk rotates from bottom to top, it cuts the pile of the workpiece up to the base. Thus, from below, on the front side, we always have a clean surface. Problems begin to form at the top where the teeth come out of the workpiece. This is how explosions, chips, and pile are obtained.
How to minimize them, or to avoid at all? There are some simple tricks and we will talk about them now.
Reception 1. Cut along the guide
We install a guide (tire) on the workpiece, set the cutting depth and perform a cut. As you can see for yourself, even on the outside of our chipboard blank, there are no chips, no undermining. He drank himself straight without signs of scoring or side waves. Why such difference?
Video: How to Cut Chipboard Without Chips
What is the merit of the guide?
When we saw with a disc, we inevitably move the saw, and so-called “movement of the iron” is obtained. That is, when we move our hand, we always move the saw to the right, to the left. A guide that has a hard edge allows this to be avoided.
Accordingly, when we guide the saw along the guide, it does not move and the saw blade itself runs smoothly without changing its position. It turns out the perfect fishing line parallel to the guide.

What if there is no hand saw and guide?
You need to make the guide yourself. We find the usual profile, you can take the rule, any smooth rail, the main thing is that its geometry is smooth.
We measure the distance from the saw blade to the edge of your chipboard blank. With any clamp, we fasten the guide to the workpiece and begin cutting.
The main thing in the process is to constantly press the saw against the guide. That is, your hand should always lead the saw in the direction of a makeshift tire.
After cutting you will get an almost perfect cut, the fishing line is barely visible. We performed the cut very high quality, the cut itself is clean, it does not show any side traces. Except for a small pile on the back of the workpiece.
Where did this pile come from, because we worked with a guide (bus)?
The purchase cutting tire has a special plastic protective tape. This tape prevents the pile from rising and the saw cuts it. In this case, we did not have this tape, so we got this pile on the surface.
What to do with pile in this case?
There are two options:
1. Take ordinary masking tape. It is glued to the place of cut on it marking is done and sawn together with masking tape. Adhesive tape keeps the growth in place and when cutting we get everything clean.
2. It’s just slower to drive the saw blade itself. That is, if the same thing is done with a slower feed, then there will be much less chips.
Reception 2. "Reverse cut."
The first pass is carried out in an unusual manner. in reverse. That is, the circular saw rotates in the direction of the workpiece feed. We set the minimum depth of cut, turn on the saw and does not move forward, but backward.
If you have a regular saw, then just fix the saw with a minimum departure for the base. The meaning of the first pass is that the blade, moving along the guide, only clings to our workpiece. We need a small groove on the chipboard.
Having done the first. undercutting, you will be convinced that there are no chips with such a feed (back). The surface is perfect!
Now we will set the saw to full depth and saw the workpiece along this groove with the usual cut. feed forward. We will get two cuts per one workpiece. There are no gouges of waves, arson, nothing. perfect quality!