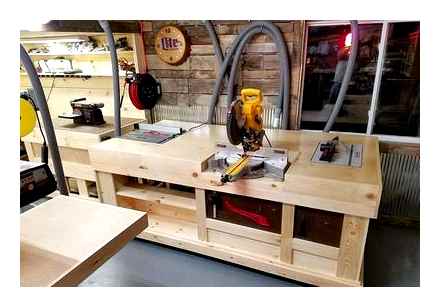
Trimming from various scrap metal
This is a rather heavy bevelling on a stationary metal table. It will take some effort to manage it. But in the end, the saw mechanism moves smoothly, without jerking, do-it-yourself trimming is easy.
- electric motor power. 2.2 kW;
- disk revolutions. 2800;
- cutting depth 80 mm.
Materials and tools required for assembly:
- 900 W electric motor;
- a metal sheet;
- metal corner;
- channel;
- hinge group;
- powerful spring;
- angle grinder;
- welding machine;
- file.
The bed is made of adjustable supports, a metal corner and racks from the old bed. The working surface is a metal sheet like the surface of the table, in which we cut a hole, we process the edges with a file with our own hands.
- The pendulum stand for the saw is welded from a channel mounted on a sheet of metal, its height is about 80 cm.
- The support for the electric motor is made in the form of a movable metal plate mounted on hinges. When installing an electric motor, a spring is used as a stabilizer. Then you can do without a pendulum and belts.
- Tension belts are adjusted with a conventional eye bolt, the swingarm for the mechanism is also made of metal.
- A disc with a diameter of 420 mm is installed on the facing as an executive tool.
A miter saw is a rather dangerous equipment, collecting it with your own hands, you need to take care of protective boxes and covers. After all, there are much more errors in the operation of home-made equipment than factory equipment.
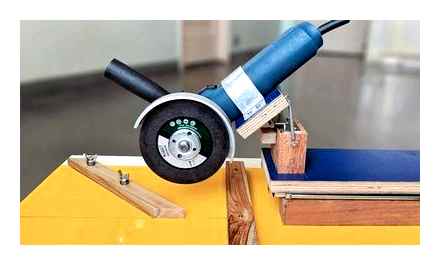
Crosscut from an angle grinder
Technical characteristics of cross-cut with a broach, assembled by hand:

- disk revolutions. 4500;
- cutting length. 350 mm (much higher than that of a middle-class factory tool).
The tool can be removed from the table and the angle grinder can be used as usual.
- The rotary device of the tool is installed on the pivot of the car wheel (pivot), it is held by a ball bearing for 150 mm (if you can find more, it will do).
- We attach the ears to the outer side of the bearing by welding to fix it on the base. It is fixed by means of M6 screws.
- To protect against shavings, the clip is covered with a box.
- We make the broach from the shock absorbers from the truck (broken ones will do). Oil is poured out of them, holes for ventilation are drilled, which should be tightened with a mesh from dust and shavings.
- To avoid a jerk when starting work, the saw is supplemented with a soft start module, which slightly reduces the speed.
- The last stage of work is the manufacture of protection for the disk.
- works very noisy;
- to adjust the accuracy of cuts in wood, trimming of bars is used, after which the thrust is fixed rigidly and you can work clean.
How to make a homemade miter saw (trimming) for wood with your own hands
The trimmer design is similar to a circular saw mounted above a work table. Its main advantages are: compactness and low weight. Thanks to this, saws are used not only in workshops, but also on construction sites. Unfortunately, DIY tools are quite cumbersome and heavy. It is convenient to operate them in stationary mode.
The miter saw is designed for a single task. trimming the ends of lumber at different angles. Due to the fact that the workpiece is stationary on the table during cutting, the cut is neat and clean. Craftsmen dealing with woodworking give preference to this particular tool. over, hand-made saws have been successfully used for years.
Advantages and disadvantages of homemade trimming
- Making a tool with your own hands saves money. For example, about 500 rubles were spent on the revision of an angle grinder. The cost of a homemade table and sawing mechanism is available to most craftsmen;
- main parameters: cutting depth, rotation frequency, disc diameter, engine power, table dimensions, are selected according to their own needs;
- having assembled the tool with his own hands, the master will easily find the cause of the malfunction and fix it.
- The service life of the tool depends on the quality of the raw materials, and homemade products are usually collected from all kinds of trash;
- homemade trims are rarely powerful enough. Indeed, for the high-quality operation of the equipment, a careful selection of parts is required;
- sometimes the funds saved on the purchase of a factory tool are spent on repairs and revision of a homemade one;
- craftsmen often save on their safety by not equipping the table and saw with protective devices;
- Factory saws are equipped with a graduated scale that accurately indicates the cutting angle of the tree. It is difficult to build such a mechanism on a home device.
A few more convenient and interesting homemade products, including an excellent stationary, mobile and made in a couple of minutes from several plywood and screws:
Miter cut based on angle grinder
To solve this problem, an angle grinder is often used. It is ideal for making your own end-face miter saw. A homemade version will have the following technical characteristics:
- the rotations of the disk of the angle grinder should not be less than 4500 rpm;
- the cutting length is 350 millimeters. Note that this indicator is significantly higher than that of a factory instrument, which belongs to the middle class.
The created design allows you to remove the angle grinder from the table and use it as a regular tool.
When considering how to make such an execution option, we note the following points:
- the cutting tool is mounted on an axle, which is represented by a car wheel. This moment determines the possibility of facing at an angle. To fix the swivel mechanism, a bearing with a diameter of 150 millimeters is used. To fix the angle grinder, a special mechanism is used, which is attached to the pivot axis. After a certain time, it is recommended to lubricate this axis, as there is a possibility of a squeak;
- to fix a certain angle during the production of the machine on a bearing, from the outside, special lugs are welded on. The fixation is carried out using a screw, for example, M6. The ears should be fastened so that there is not a large distance between them. Otherwise, there is a possibility of a strong backlash, which will significantly reduce the processing accuracy;
The last step in production is the creation of the saw blade. This element eliminates the likelihood of foreign bodies entering the cutting zone. Your own miter saw can be used at home.
However, the design under consideration also has significant drawbacks that should be taken into account. These include:
- DIY miter saw is very noisy. This is due to the peculiarities of the angle grinder. During processing, noise appears, which is almost impossible to reduce;
- the cross-cut machine is used for high-quality processing of end surfaces. That is why quite a lot of attention is paid to the accuracy of the positioning of the angle grinder with the disc relative to the workpiece. To adjust the position of the angle grinder with a disc, trimming bars are used. The traction should be fixed with a bolt, after which processing can be carried out.
The drawings of the trimming machine determine that it can be installed quite simply in almost any workshop. It should be borne in mind that the structure is small, and the workpiece can be quite large. In order to eliminate the likelihood of loss of accuracy during processing, the structure should be fastened to the base.
Particular attention is paid to the type of disc installed. Initially, the angle grinder was designed for metal processing, which determines the presence of a large number of discs for metal. But there are also discs for wood processing, which have their own characteristics.
note that there are quite a few drawings that can be used when creating a miter saw. Some are easy to implement, others are difficult to implement.
If you find an error, please select a piece of text and press CtrlEnter.
Rough wood stripping
Cutters
They are, and especially for wood. The assortment is significant, since nozzles of this type differ in configuration, location and size of teeth.
How to Make a Poor Man’s Mitre Box | Paul Sellers
- Sampling of grooves.
- Pre-alignment of edges.
- Bowl carving.
- Sawing (for small section timber).
Disks
These attachments are available in various designs. The main difference between the devices is in the size of the abrasive grains.
Disc planer
This attachment virtually replaces this hand tool one hundred percent.
Don’t Buy A Mitre Saw // Precision Miter Box
An irreplaceable item, if required, for example, to perform preliminary processing of a log. during the construction of a log house, preparation of fencing supports, etc.
- In this case, the protective cover can be removed. Such a packing is one-piece and does not break. But protection from flying chips (glasses, thick clothing, gloves) is required.
- It is allowed to work only with an “angle grinder”, in which the 2nd handle is provided (or installed). the angle grinder must be held with 2 hands when pre-processing the wood.
Wood polishing
For these purposes, brushes, discs and circles are used. Their “working elements” can be made of sponge, felt, fine-grained “sandpaper” and a number of other materials.
The article provides examples of only the basic types of attachments for the “angle grinder”. There are quite a lot of products of this class, so it is not difficult to choose the best option for processing any wood. The author hopes that the information provided will help the reader with this.
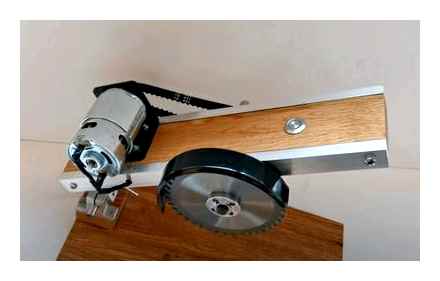
Pendulum engine mount
Those who can boast of the ability to work with metal can be advised to make a circular with a pendulum engine mount. The main feature of the device is that the motor, shaft and cutting disc are mounted in one common frame. On the one hand, it is hinged to the bed, the other is held in place by a screw with adjustable height. By changing the length of the screw, you can adjust the height of the disc exit from the tabletop.
This system allows you to adjust the cutting height, as well as use discs of different diameters. If, instead of an adjusting screw, you use a dipstick brought out to the tabletop, you can get a simple copying machine. The probe will allow you to adjust the cutting depth according to a certain template. This simple enough modification will turn a simple circular saw into a real woodworking machine. With such a device, you can not only cut the board into the necessary blanks, but also make precise cuts, make various samples.

With a broach
This device is considered the most versatile, since the saw can be displaced not only around the axis, but also along the cut along a straight mowing line.
Combined
When using a combined saw, the cutting angle can be changed in 2 directions. The device, like the previous version, contains an additional hinge. In order to change the cutting angle, it must be adjusted and retracted to the side opposite to the place where the drive is mounted.
Let’s start assembling
- We cut out a rectangular sheet of plywood and make a long cut on it, along which your trimming will ride;
- From above we fasten two guides, for example, from an aluminum corner, to the width of the working plane of the circular itself;
- From the bottom to the plywood sheet you need to screw two supports with a height equal to the cutting depth of your saw (5.3 cm).
As a result, we get a guide along which the circular will walk. Depending on how we fix it on the table with such a simple mechanism, we can make an accurate cut at any angle. The simplest design option is ready.

What if we want our miter saw to be more functional at work and look like a factory miter saw? In this case, you will have to show more ingenuity.
- First, you need to make a bracket and a stand on which the circular will be fixed. Chipboard (27 mm) is an excellent raw material for such a mechanism. With the help of self-tapping screws and aluminum corners, you will get a very decent top end. And the springs fixed on top can make the work on such a saw more convenient;
- Secondly, you need to fix the tripod itself on a movable pivoting footboard, make a pendulum saw, thanks to which we will eventually be able to change the facing angle.
Caution! From what material you choose for the stand and tripod, how securely you attach them to the footboard, not only the quality of work and functionality of the trimmer will depend, but also your personal safety. No wonder they say that if a carpenter is experienced, then he is sure to be without a finger
Fasten the circular as securely as possible! Safety first!
Homemade Miter Saw Build Part 1 // Gönye Testere Yapımı 1. Bölüm
As for the trimming itself, everything is said about the assembly. However, if we decided to make a saw that looks like a factory saw, then it will be difficult to do without a table.
The tool can be removed from the table and the angle grinder can be used as usual.
- The rotary device of the tool is installed on the pivot of the car wheel (pivot), it is held by a ball bearing for 150 mm (if you can find more, it will do).
- We attach the ears to the outer side of the bearing by welding to fix it on the base. It is fixed by means of M6 screws.
- To protect against shavings, the clip is covered with a box.
- We make the broach from the shock absorbers from the truck (broken ones will do). Oil is poured out of them, holes for ventilation are drilled, which should be tightened with a mesh from dust and shavings.
- To avoid a jerk when starting work, the saw is supplemented with a soft start module, which slightly reduces the speed.
- The last stage of work is the manufacture of protection for the disk.
- works very noisy;
- to adjust the accuracy of cuts in wood, trimming of bars is used, after which the thrust is fixed rigidly and you can work clean.
Combined
When using a combined saw, the cutting angle can be changed in 2 directions. The device, like the previous version, contains an additional hinge. In order to change the cutting angle, it must be adjusted and retracted to the side opposite to the place where the drive is mounted.
Combined
When using a combined saw, the cutting angle can be changed in 2 directions. The device, like the previous version, contains an additional hinge. In order to change the cutting angle, it must be adjusted and retracted to the side opposite to the place where the drive is mounted.
Pendulum
The basic part of such a saw is the bed. A table is attached to the bed, which must have a swivel mechanism equipped with a ruler. It is this mechanism that allows the cutting process to be carried out at a certain angle, adjusting it to the specific individual needs of each user. over, this angle can be changed by moving the desktop directly in relation to the bed.