Reel for grass trimmer and line threading with their own hands
In today’s agrarian economy, there are a lot of all kinds of tools that are designed to make life easier for dacha owners and amateur gardeners. In my opinion, the lawnmower type of flax trimmer for grass is one of the very simple and ingenious inventions that can, in a matter of minutes, turn your overgrown with weeds homestead into a well-groomed lawn. But no matter how clever the invention is, it needs care and repair. I am not a supporter of industrial tools alterations, but in order to save money I invented and describe a useful addition to the blade trimmer.
When you start a power tool in the household you should immediately understand that in addition to the electrical part there is also a mechanical part, which requires timely maintenance, cleaning, cooling and lubrication. Electric grass trimmer blade is no exception. I will tell a little about his trimmer, the model and the parameters I do not specify. it is not so important. The first thing that failed in it was the button, when I took it apart, there were clear signs of melting, I think it was caused by power surges and the processes that occur at the time of switching. And to put it simply, it was of poor quality. Like many other trimmer parts for grass, the button can be replaced with another one, suitable to the parameters (current and design). Blade for grass trimmer, well, by the way, like other nozzles is an expendable material, and it is natural that it ended up and at me. Like a typical dodger, I started to put in there everything I could, from ordinary thick fishing line to a thicker and stronger special line for grass trimmer. In spite of my natural curiosity and inquisitiveness, I acted within the framework of the instructions I had read, but even that did not save my coil from destruction.
Reel from my grass trimmer Reel as seen from the side
As if the spool (I mean the part where the line is wound), is not very that suffered in the course of my experiments, but the special grooves that hold the line simply grooved, it is not surprising because they are plastic, and trimmer I use for a long time and quite often. Of course, even for older models of trimmers spare parts are sold, from the reel to the engine. But the new spool seemed to me too expensive, the price was really “biting”, and I was not satisfied with the fact that the line of 5 mm thickness can not be tucked in there (my grass trimmer is designed to use 2 mm thick lines).
And so after much deliberation on how to modify the coil trimmer for grass, I came up with a simple idea, easy to implement and fairly easy to use. It is necessary to cut a circle out of strong material. I used 4mm thick foil-coated textolite.
You need to make a hole in the center of the disk matching the diameter of the spinning shaft axis, and four more holes (or maybe more) matching the diameter of your fishing line.
The idea is very simple, you don’t use a reel, you don’t wind the fishing line, you just tie it to the holes and attach the disk to the holder on the same principle as the old reel, it is only important to find the right spring. to secure it (who has a trimmer for grass will immediately understand what spring we are talking about).
Tie pieces of fishing line to the disk Tie the line and fasten the disk to the holder
You don’t have to tie it, it is holding on strong enough and won’t fly out, in spite of high rotations. With the suggested arrangement of the filament guide in the grass trimmer, you benefit in that you can hook any diameter and configuration of filament into it and you will never need to spend money on new spools. But there are some disadvantages. you need to cut pieces of string to a certain length, it may not always be convenient. But in terms of time and effort to thread the line, no worse than the classic way in the native spool.
I took a photo without the grass trimmer and stop spring, as I was not in the country at the time. But I can safely say that the result of my revision surpassed all my expectations. Now I have much less spending on consumables for grass trimmer, which once again proves the triumph of reason over the dogmas of the instructions included with purchase tools.
Grass trimmer line diameter
The main aspect of the line for the grass trimmer is its cross-section. How to make a trimmer for grass with his own hands from an angle grinder (starter). As in the following picture. It can be 3.2, 3, 2.4, 2 or 1.6 mm. How to do it with and how to change a line for a trimmer. A bogeyman on a timeless theme. The thicker the line for trimmer, the thicker the plants you can mow with your brushcutter. The most popular and widespread line diameter. 2 mm.
The line diameter should be matched to the engine power of the grass trimmer and your brushcutter model. For a low-powered machine, a line diameter of 1.3-1.6 mm is suitable, and for a device designed to work with soft and stiff vegetation. 1.8-2mm.
If you’re not sure which diameter to choose, consult the data sheet before buying. There you can find the optimum line diameter specified by the manufacturer.
Length of line for grass trimmer
Usually, the length of grass trimmer fishing line is determined based on the size of the package in which the product is sold. Grass trimmer from angle grinder part of how to wind the line for the trimmer on the grass trimmer head or. How to wind a line for a trimmer on an electric grass trimmer see the video addendum. In the stores you can see lines of length from 10 to 100 m. In the latter case, the kit often includes a new spool.
DISBALANCE, does the word symmetry mean anything? plates are the same, the holes are equidistant from each other
Technical characteristics
When choosing a quality line for grass trimmer, you need to pay attention to the technical parameters of the product. For productive work of the garden tool, the thickness of the line, its strength, and the shape of the string section are taken into account.
Classification by diameter
For lawnmowers, lines with a diameter of 1.2 to 4 mm are available. Dense filaments are used infrequently. The grass trimmer is generally equipped with a cord that is no thicker than 3.2 mm.
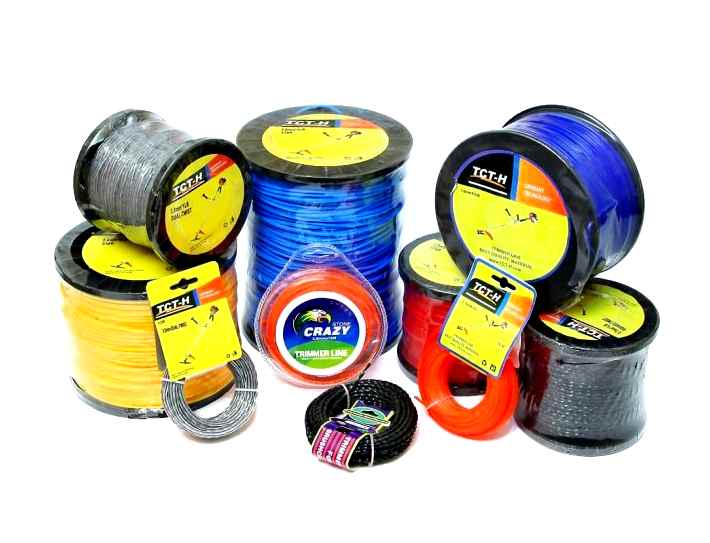
The range of lines for grass trimmer is very wide
There is a different line thickness for each type of mowing equipment. If you use a thinner filament than it is supposed to be used for a certain model, the speed of the shaft will increase, which can lead to a decrease in the functionality of the mechanism. String that is too thick in a grass trimmer slows down the rotation and often causes engine malfunction.
For each trimmer class, there is therefore a certain line diameter:
- Thin line. 1.2 to 1.6 mm. This string is designed for regular lawn treatment. It is usually used in electric trimmers with low power. 500 watts. Good for cutting younger grass.
- String for medium-diameter trimmer. 2.2.4 mm. Cord is used both for gasoline trimmers and for devices operating on electricity. With this line you can cut not only succulent but also dry and hard lawn grass.
- Thick cord. 3 to 3,2 mm. String is attached to high-powered devices for cutting plants with thick stems and dead wood.
2 mm cord, 2 mm in diameter, for gasoline trimmers with bent shaft. For models with a straight construction of the mower’s moving mechanism, thicker cords. 2.4. 3 mm are usually suitable.
4 mm trimmer line can be installed in a lawnmower with a very powerful engine. It is most often used for removing overgrown weeds with thick and stiff rods.
Pick up a thread to the trimmer required thickness can be according to the operating instructions supplied with the unit.
Classification of lines for grass trimmer
Classification by cross-sectional area
Trimmer lines are made in different sections. The most relevant is considered, the round form of thread. They are versatile and inexpensive.
Each form of line has its own purpose, as well as advantages and disadvantages:
- Round yarn. Trimmer lines come in a variety of thicknesses and are therefore used for cutting any type of grass vegetation. With low consumption it can withstand considerable loads. The disadvantage of round line is a high noise level during work and inability to cut driftwood.
- Twisted cord. With this line shape you can mow tough grass, including coarse brushwood. The trimmer line is very strong and works very quietly. But it can only be used with certain lawnmowers. Also, twisted cord is relatively inexpensive.
- Multifaceted line for trimmer. The thread can have from three to six edges. Used for high-powered devices. Handles thickets of dead wood and bushes with strong, stiff branches. The only disadvantage is the high consumption of the product.
- Curved cord. The thread can withstand heavy loads. Cuts grass of any density and density, including branches of bushes.A special reel is required with this line. Not often used because of high cost.
For regular lawn care mostly round strands are used. All other products with different cross-sectional shapes are used only on thickened areas, where you need to put more effort to clean it.
For regular lawn care, circular filaments are mostly used
Classification by structure
An important criterion for selecting a filament for the grass trimmer is its structure. The qualities and type of material determine the longevity of the product. Three types of trimmer line are available:
- Nylon. The most common type of thread for lawnmowers. It is flexible and lightweight. Material has high wear resistance and does not deteriorate from temperature changes. Profitability of line use is justified by low cost and productivity.
- Coaxial. Elastic cord with a strong core inside. Such a line for the trimmer has high wear resistance and withstands the highest loads. It is considered the most expensive and the strongest.
- with aluminium inlay. With this line you can mow rough thickets of weeds, it contains small fragments of aluminum, which give it high strength.
Nylon thread is the most popular among users. Aluminum and coaxial fishing line for trimmers is mainly used for trimming sturdy branches and dense thickets with a high power grass trimmer
Grass trimmer line winding technology
Once the spool is removed and disassembled you can start winding the line. If only one tendril is sticking out of the spool, everything is simple here. You need to unwind 2-4 meters of fishing line, this is half a skein of fishing line that you bought in the store, find on the inside of the spool fixing the line for the trimmer a hole, insert one end of the line there and start winding up the line for the trimmer in the direction opposite to the direction of rotation of the spool on the trimmer.
On the inside of the spool there is usually an arrow showing which way to wind the line for the trimmer. Having coiled a fishing line for a trimmer, we leave its small piece to put it through a round hole of a spool. This piece is fixed in a special groove located on the inside of the spool, designed to prevent the line for the trimmer from unwinding at the moment of assembly of the spool. If there is no such a groove, you have to hold the line for the trimmer with your finger to prevent it from unwinding during the further assembly of the spool. Next, we take another part of the spool and thread the remaining piece of fishing line through the existing hole. After this you can assemble the spool and put it back on the grass trimmer.
How to make a spool yourself
Scheme of filling the grass trimmer spool with fishing line. The basis of self-made spool is a disc of durable material. It is best to use for this purpose textolite about 5 mm thick. It is sufficiently strong and reliable. The size of the disk depends on the dimensions of the grass trimmer and personal experience. how to work more conveniently.
Next, a hole must be drilled in the center of the disk. Diameter of the hole should be equal to the diameter of the rod axis (the latter is attached to the rotary shaft of the engine). At the same time it is extremely important to determine exactly the center of the disk. After that it is necessary to drill 4 holes for the line for the trimmer. Their diameter will be equal to the diameter of the fishing line, and they will be located in pairs on opposite sides of the axis of rotation (2 on one side, 2 on the other from the axis of rotation). In this case the construction of the spool is greatly simplified: it is not necessary to wind a large amount of fishing line, and it is enough to fix (tie) a small section of it through the ready holes.
To give the construction the necessary strength and reliability, it is recommended to find a spring, the inner diameter of which will be equal to the diameter of the shaft, and install it on the shaft over the finished disc.
Once the trimmer line is tucked in and secured to the disc, you can begin testing. the line for the trimmer can not be fixed on the disk: even if it is put through the holes, it will not fall out, because the engine gives a large rotation of the shaft, and the centrifugal force is enough to keep the line under load.
Such a design instead of buying a spool for a grass trimmer has many advantages: it can install any line for trimmer (both thin and thick), the device itself is practically “unkillable”, and do not need to buy a new spool for a very long time.
The disadvantages of this homemade reel should include the following:
- The need to cut a couple of pieces of fishing line of equal length;
- when installing without line attachment, it is necessary to make sure that equal sections of line hang from the spool.
The body can be used from an old spool. it rarely breaks.
Unbreakable knife for garden trimmer for grass with their own hands.
Not always the lawn on the plot is a soft green carpet. When a friend bought a house in the country, I was amazed at the neglect of the site. Not only that I have not planted anything on the site, I have not even mowed the jungle of weeds. The only thing I could state, looking at this mess: the earth is rested and fertile.
I had to put the electric grass trimmer I bought earlier back in the garage and armed myself with shovels and an axe. We shoveled vigorously all day, but only about a quarter of the land was cleared. The rest we postponed until the next weekend.
The next weekend a friend bought a three-blade blade for a grass trimmer. Despite the rainy weather we had a test
The very first impression: any serious trunk of a weed caught by this knife gives off a powerful blow in the hands. After about 10 minutes of work the sharp edge of the knife got blunt and there were a lot of burrs. It didn’t make sense to kill the weed trimmer any further. My friend decided to sharpen and harden the knife in production conditions.
On the next weekend I come to visit him.
-. And how are we going to clear the thicket? You joined the Greenpeace Society in a week and decided to save the jungle?
-No. I made a different design knife!
I immediately called the design “boomerang”) Not only is it pleasing to the eye, but it is very competently made! The curved shape eliminates the impact of twigs and trunks. This will extend the life of not only the blade sharpening, but also the grass trimmer bearings. The holes in the plane of the blades are made to increase the strength of the petals. Knives are a little longer than the “native” ones
This is done to increase the length of the cutting edge. There is still a couple of centimeters distance to the stop of the limiter
Tested the new knife in action. Impressions are very positive! No vibration, no knocks. Gives me a clean cut in thickets. The rest of the jungle was cleared out in a couple of hours. We had time to go over it with the power till the evening.and used his cultivator to loosen up the virgin soil.
When asked for a drawing, he just shrugged his shoulders. He drew it without any calculations on a life-size piece of cardboard. Then the fitting is in progress. If you’re interested, I can outline the area with a knife on a piece of cotton slate.
So completed the construction of the “king’s cabinet”. But that will be a separate story.
My other dacha-household homemade things:
Unbreakable blade for garden trimmer for grass with their own hands.
The lawn is not always a soft green carpet. When a friend bought a house in the country, I was amazed at the desolation of the site. Not only have we not planted anything on the site, we haven’t even mowed the jungle of weeds. The only thing I could state, looking at this mess: the land is rested and fertile.
We had to put the electric grass trimmer we bought earlier back in the garage and arm ourselves with shovels and an axe. Waved vigorously all day, but cleared only a quarter of the plot. The rest is postponed until next weekend.
A friend bought a three-blade trimmer blade for the next weekend. In spite of the rainy weather, we did the test
The very first impression: any serious trunk of a weed caught by this blade gives a powerful blow in the hands. After about 10 minutes of work, the sharp edge of the knife blunted and formed a lot of burrs. It didn’t make sense to kill the weed trimmer any further. A friend decided to re-sharpen and harden the knife in production.
On the next weekend I come to visit him.
-. And how we are going to clear the bushes? You joined Greenpeace in a week and decided to save the jungle?
-No. I’ve made a different design of blade!
I immediately called the design “boomerang”) Not only is it pleasing to the eye, but it is very cleverly made! The curved shape eliminates bumps from branches and trunks. This will not only extend the service life of the blade but also of the grass trimmer’s bearings. The holes in the plane of the blades are made to increase the strength of the petals. Length of the blades is slightly longer than the “native” blades
I did it to increase the length of the cutting edge. There’s only a couple of centimeters to the limiter stop
Running a new knife in the works. My impressions are very positive! No vibration, no bump. It cuts the trunks like butter. The remaining portion of the jungle cleared for a couple of hours. We still had time to go over the power harvester before the evening.with a cultivator to break up the virgin soil.
When I asked for a drawing he just shrugged his shoulders. Made a life-size drawing on a piece of cardboard, without any calculations. Then the fitting is in progress. If anyone is interested, I can put the knife on a piece of absorbent cotton and trace the outline.
Also completed the construction of the “king’s cabinet. But that will be a separate story.
My other dacha-homemade DIYs:
How to remove the blade from a lawnmower
The process of disassembling the machine depends on the type of lawnmower, but before you start, make sure that all safety rules are followed.
A machine powered by electricity must be de-energized.
In a car that runs on gasoline, first of all the spark plug cap is removed. It is important to exclude a fuel leak, so the fuel tank of the machine should be empty. You can shut off the fuel tap, pre-installing a tight-fitting rubber diaphragm under the cover. After that, the gas hose is squeezed, designed for drainage of the crankcase waste. Otherwise there is a risk of oil spillage. Always refer to the instructions to avoid possible complications.
The blade is attached in two ways: a single bolt in the center of the structure through a shaped washer, or a pair of bolts that are attached to a pin or alignment hole. The bolts are unscrewed in a clockwise direction. During this, it is important to secure the cutting parts of the lawnmower to avoid injury. A wooden block with a stop on the ground is the best way to do this.
Cleaning and straightening
First the working part is cleaned of dirt or debris that has adhered to it during operation. The most suitable tool for this job are metal brushes. When the blade is clean, degrease the surface and inspect the damaged blade.
Small, hard debris that gets under the tool during operation can distort the pruning shear. Only the cutting edge of the mower blades need to be inspected for warping, t.к. The blade itself is difficult to balance. A damaged tool can be straightened by hitting it carefully with a hammer with rounded edges. Place the blade on a hard surface, e.g. an anvil. To straighten it, start from the edges of the distorted area and gradually move towards the center.
Balancing the blade
Balancing the blades is an important consideration in the operation of the lawnmower. Without this, the cutting elements will create constant vibrations, which reduces the longevity of the technique and complicates the work. This is primarily important for the tools with double-sided single blades, for the other types it is not so critical.
To check the balance you need to fix in a horizontal position smooth and thin rod, clamping the end of the vise. Then the blade is put on the prong and fixed. If there’s no balance, the blade tips can move relative to each other.
For the correct balancing of the blade, first the metal on the back of the secateurs is ground down so that the overhang is eliminated. It is impossible to achieve an exact balance at home. For the mower to work efficiently, it is enough for the blade to hold horizontal for a while.
How to make a simple and in fact eternal grass trimmer reel.
Do it yourself
Hi. I will not delay long. And at once I will tell what we need and in general for what all this is conceived. It’s that simple. Imagine, you mow your 5-10 acres in the countryside. No matter what trimmer (petrol or electric). And then your spool dies, you know, it washes out. It happens. It is clear that adherents of the grass trimmer blade will immediately take it. But imagine that you have a lot of gravel in the grass. It’s just dangerous to mow with a knife. And in general, it just rolls grass but does not grind it at all.
And that’s where a simple wit and old grass trimmer parts come in handy.
You’ve probably got an old spool lying around. That’s where we need the nut. For it has a reverse thread. We need to squeeze it out of the spool.
Then you need to pick up a nut normal and slightly larger than the “nut” from the trimmer for the grass. Ideally, of course, you want it to sink in a little bit. For better welding further
We strip the nuts down a little bit, one of them rusty. The other one from the zinc on top.
And then we weld it all on to our crown shocker! It’s called a seam. “poo-poo-poo.”. On the main thing that’s holding on.
And after grinding the seam with an angle grinder we get these two nuts
Next, in a larger nut through holes are drilled on the sides, they will be guides for fishing line
Actually here is a fishing line for the trimmer. We bought it to try, but the spool can not stand it. It stops auto-feeding and that’s it.
So we put the line for the trimmer through the drilled holes in the nut. Leaving an even moustache on both sides. From the shaft. And bite off
And then the steps are very simple. We screw our nut with a reverse thread on the grass trimmer. Thereby clamping the trimmer line with the shaft in the middle. I bent the trimmer line a bit before screwing it in, but it would have held firmly.
And here is the test so to speak in the “field”. Let’s mow. Again, I want to add that this home-made tool will help finish mowing a small patch, and not mow all of your 5 acres.! And anyway, the trimmer line will fly away., tear and twist. As I generally did. the trimmer line, because it’s rigidly fixed, it starts to curl into a braid
But then again! It works! And you can do it in 15 minutes if you have a hand.
And then again! You can watch the video right here and now
Well, that’s all for me. Thank you so much for reading. Be sure to write your thoughts in the Комментарии и мнения владельцев. Without this nowhere!
How to make a simple and, in fact, eternal coil for grass trimmer.
Do it yourself
Hi. I won’t tighten it long. And I’ll tell you right away what we need and what it’s all about. And it’s simple. Imagine, you mow your 5-10 acres in the countryside. No matter what trimmer (gas or electric). And then you’ve got a dead reel, you know, it’s worn out. It happens. It is clear that adepts of grass trimmer knives will take it right away. But imagine you’ve got a lot of chippings in the grass. It’s just dangerous to mow with a knife. And in general, it’s just a grass trimmer, but it doesn’t grind it at all.
And then comes the help of simple wit and old spare parts from trimmers for grass.
You’re probably lying around an old spool. That’s what we need a nut for. Because it’s threaded backwards. You have to squeeze it out of the spool.
Then you need to pick up a nut normal and a little bigger than the “nut” from the grass trimmer. Ideally, of course, you’d want it to sink in for a while. For better welding
A little peeling of the nuts, one from the rust. The other one from the zinc on top.
And then we weld the whole thing to our Crown Shock! It’s called a seam. “puckered up.”. On the main thing that sticks.
Well, after scraping the seam with an angle grinder we get these two nuts
Next, we drill through holes in the sides of the larger nut, they will be guides for the fishing line
Here’s the trimmer line. We bought it for a test, but the reel can not stand it. The auto-feeding stops, and that’s it.
So we put the line for the trimmer through the drilled holes in the nut. Leaving an even moustache on both sides. off the shaft. And we bite off
And then the steps are very simple. We screw our reverse threaded nut onto the weed trimmer. Thereby clamping the trimmer line with the shaft in the middle. I bent the trimmer line a little before twisting it, but it would have held on tight.
And here’s the test, so to speak, in the “field.”. Let’s mow. Again, I want to add that this handy thing will help you mow a small patch, and not mow all of your 5 acres.! For all the same line for the trimmer will fly away., tearing and twisting. As it happened to me in general. the line for the trimmer because it is rigidly fixed it began to curl into a pigtail
But then again! It works! And make it a theme if you have a hand can be for 15 minutes.
But then again! You can watch the video right here and now
Well, that’s it for me. Thank you so much for reading. Be sure to write your thoughts in the Комментарии и мнения владельцев. Without this nowhere!
Grass trimmer blade attachment
Quite often an inconspicuous stone, driven in by a peg or just a dropped bottle can cause a failure of an important part of the grass trimmer. of the plastic line reel. As you can improve and make more resistant grass trimmer look further.
Going shopping for spare parts is a thankless task, and I gave up the idea at once. What is the sense of wasting time and money if the new part will serve not longer than the old one, but only until the first meeting with some metal lurking in the grass. It’s better to replace the broken reel with a self-made stainless steel blade (see Stainless Steel Blade). photo).
The construction of the nozzle is very simple. To make it I needed to make only four parts: central bushing, washer and two petal blades (see pic. Fig.).
The central hub I made from a scrap of ordinary water pipe. To match its inner diameter to the diameter of the shaft, on one side of the blank I made a through longitudinal cut and lightly hammered. The bushing should sit on the shaft tightly, without play.
I managed to find a washer with suitable dimensions. But if you don’t have one, it’s not hard to chisel out a 34 mm thick sheet of steel and finish it with a file. The washer was put on the bushing and welded at four points. This is quite enough.
I have cut blades of stainless steel sheet of thickness 1 mm. They are riveted to the washer. They must be made of steel. I used M4 screws as rivets. They must be riveted so that the knives are not pressed rigidly against the washer, but can turn freely. This is a very important point. If the knives are fixed rigidly, they are sure to bend or break the first time they encounter a stem that they cannot cut in one revolution of the grass trimmer shaft.
The assembled nozzle is put on the shaft of the grass trimmer and fixed with a copper cotter pin ∅3 mm. It is better to drill a hole for cotter pin on the spot.
The first tests with the grass trimmer and the new blade attachment confirmed its effectiveness. blades “took” practically any grass with ease. The motor is not overloaded even during unhurried operation. In a word, that’s what I needed!
Remember, however, that metal knives are a more serious hazard than a thin, almost weightless trimmer line. Therefore, to mow the grass around the house, preferably when there are no people or pets nearby. and of course you have to keep an eye on the wear of the blades and rivets that hold them in place.
As it turned out, modifications are very simple in nature, and with everything you need, it took 10-15 minutes, no more. You just have to know how to handle the drill and the welder.
Using a chain from a chainsaw has not only increased the tool’s efficiency tremendously, but it has also cut maintenance costs. at least I don’t need a line for my grass trimmer anymore.
Safety first of all!
Do not forget about safety when working with a trimmer! Bushes are blown far away and with great force. Use personal protective equipment. wear a special mask, make sure there are no people or animals around.