How to remove the chuck from an electric screwdriver
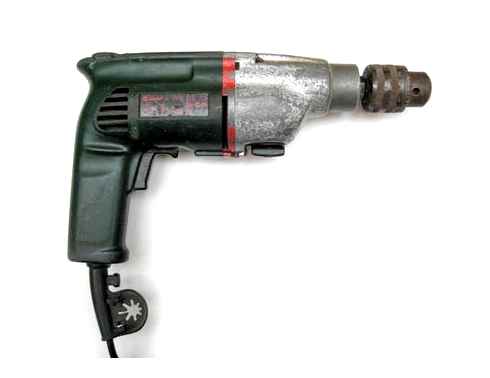
The chuck or head is a metal cylinder that is attached to the shaft of an electric screwdriver. Its purpose is to hold the working bits securely in place under the fasteners. The chuck is fixed on the shaft with a thread or a special cone. Clamping elements are divided into the following according to the type of attachment:
The difference between the first two types is only in how the bit is clamped. In the quick-action chuck, the shank is screwed in and clamped manually. In modern drills and screwdrivers, clamping jaws are used for clamping shank diameters of 0.8 mm to 25 mm.
The BZP type device consists of these parts:
The BZP heads are available as single or double socket. The first type is used in screwdrivers with a locking mechanism. This gives the clamping device a one-handed operation, since the other part of the body is held in place. With double-clutch cylinders, both hands are used.
In a self-clamping chuck the bit and drill bit are automatically clamped during twisting. The risk of rotating the drill bit with this electric screwdriver is practically nil. A clicking noise is heard when the cams are loosened and clamped.
It is not possible to screw in the cam chuck by hand. an L-type wrench is needed. It’s inserted perpendicularly into the slot. The FOB, i.e. toothed-ring chuck, is considered less convenient to install, but provides a more secure grip on the bit. This is a type of cam-type clamping cylinder. This socket consists of three basic elements: the cylindrical body, the rotating outer ring and the inner cam mechanism. The mechanism is made of solid steel and consists of 3 cams that lock into place when the ring is turned.
How to Disassemble the Chuck
To repair or lubricate the parts, the chuck must be disassembled. There is a plug at the base. It must be removed by prying with a knife or screwdriver. If it is metal, you need to hit the base of the jam sleeve.
Once the plug is removed, the cylinder is disassembled. It must be divided into its constituent parts: sleeve, base, washer and bearing. Some manufacturers additionally include a retainer. After performing the required actions it is necessary to assemble all the components back.
The options for attaching the electric screwdriver shaft
The chuck is attached to the tool shaft by means of:
- threads. To do this, the threads on the cylinder and the shaft must be identical. Metal cylinder screwed onto the shaft.
- fixing screw. The mount also requires screwing, and the screw itself only increases the contact between the chuck shell and the shaft. It has a notch for a Phillips screwdriver and a left-hand thread.
- Morse taper. One of the oldest fixing methods. The shaft of an electric screwdriver has a tapered shape and the same groove is made inside the sleeve. When the outer and inner cone are joined, the head is securely seated on the shaft.
How to remove?
Now let’s talk about how to remove the part in question. This may be necessary for routine cleaning and lubrication, which will increase the life of the tool. Let us first examine the case of disconnecting a cartridge with a retainer bolt. You will need a hexagon of the appropriate size:
- first unscrew the screw clockwise if the part is left-hand threaded;
- before unscrewing the chuck it is necessary to unclench the jaws as much as possible to see it;
- insert the wrench into the cams and quickly turn it counterclockwise;
- unscrew the chuck.
If we are talking about dismantling the chuck with the Morse taper, you must have a hammer handy. Using it, you can dislodge the shank from the housing socket. First disassemble the electric screwdriver, and then pull out the shaft with the chuck and gearbox located on it. Using a pipe wrench, unscrew the cylinder clamp.
Now let’s move on to the dismantling of the chuck with a threaded connection. The order of action will be as follows:
- We carry out unscrewing of threaded fasteners with L-type hexagon;
- insert the 10 mm wrench into the cylinder with the short side, and then firmly fix it with the cams;
- start the electric screwdriver at low speed, and immediately turn it off so that the free part of the hexagon strikes the support.
As a result of all the actions performed, the fixation of the thread should loosen, after which the clamping cylinder can be removed from the spindle without much difficulty.
Sometimes the removal cannot be done by any of the above methods. Then the device should be disassembled, and depending on the manufacturer and model perform some or other actions. Let us show the disassembly process on the example of an electric screwdriver from Makita.
Owners of such models have the need to unscrew the chuck, where a threaded fixation is used with screw-type fasteners, which perform an auxiliary function.
Then it is necessary to unscrew the screw and then press the shaft stop button. Then wrap the electric screwdriver body in a cloth and clamp it in a vise. We clamp the hex wrench in the cams and hit it with a hammer so that the cylinder can be removed.
How to remove and disassemble the chuck of an electric screwdriver
Jaw chucks are less convenient, but provide a more secure connection. As the wrench is turned, the adjusting sleeve compresses the steel cams until they are closed.
Quick-clamp fasteners tighten faster. No wrench is needed.
Types of quick-clamp designs
- single socket. only one hand is needed to insert the bit as one part of the body locks automatically.
- Two-coupling. both parts are movable, and one of them must be held by hand so that it does not rotate.
If you need to replace a chuck on an electric screwdriver, you should take into account that the single-cut chuck is only used on tools with locking mechanisms.
Material is plastic or metal. Plastic products are less reliable, but are easier to work with as they weigh less.

DeWalt Cordless Drill Repair. How to Replace the Keyless Chuck
Reason for replacement
Chuck has to be changed if it is loose, the jaws do not clamp the drill firmly or if it is loose. A small amount of play (1 mm) is usually not a significant problem. For larger sizes pay attention to the condition of the gearbox. Drill bits fly out during operation because of poor clamping. Replace if you want to use a different chuck size or design. Also when the drill itself starts to twist from one side to the other. In addition to wear and tear on the jaws, chuck failure and cracks could be the cause. It is easy to remove the part. No special skills or tools are required.
There are 3 ways of fixing the chuck to the spindle:
In the first case, there are threads on 2 mating parts. The cylinder is screwed onto the shaft.
In the second method, a screw is used to increase the contact between the cartridge case and the shaft. Here they are screwed in the same way, and the fixing element is additionally secured. The screw most often has a Phillips head and a left-hand thread. To view it, the cams are pulled apart as far as possible.
The Morse taper fixation requires a tapered shape on the surface of the shaft. The two tapers are matched so the parts fit together quickly and securely.
Reason for change
Replace the chuck when it has fallen apart, the jaws do not clamp the drill bit firmly, or if it is loose. A small amount of play (1 mm) is not usually a significant problem in operation. If the value is larger, it is necessary to pay attention to the condition of the gear. Drill bits fly out during operation due to poor clamping. Chuck is replaced if you want a different chuck size or design. Replace and when the drill itself begins to drive from one side to the other. As well as wear and tear on the jaws, it may also be the result of a falling chuck and cracks. Removal is straightforward. You do not need any special skills and have special tools for this.
There are 3 ways of fixing the chuck to the spindle with:
In the first, there are threads on the 2 mating parts. The cylinder is screwed onto the shaft.

In the second method, a screw is used to strengthen the contact between the sleeve and the shaft. Here, too, the screws are screwed in and the fixing element is additionally secured. The screw most often has a cross-shaped head and a left-hand thread. To view it, the cams are pulled apart as far as possible.
Locking with the Morse cone assumes a cone-shaped surface of the shaft. The two tapers are matched, so the parts align quickly and reliably.
Ways of fixing the cartridge
Before removing a chuck from an electric screwdriver Hammer (Hammer), Hilti, Hitachi DS 12 DVF 3, Enkor, Elitich, Resanta, Union, Stanley, Diold DEA. 12LI-08, Makita DF (Makita DDF), Metabo (Metabo Powermaxx BS), Patron, Pit, Skil, Sturm (Sturm), AEG 14, AEG 14.4 and others, it is necessary to determine the way of its fixation.
Bit holders are connected to the tool with a :
- Morse cone. This type of attachment is one of the very secure. The cartridge is put on the shaft and snapped.
- Threads. In this case, it is screwed onto the shaft.
Some manufacturers in their models as an additional connection put a fixing screw.
On the electric screwdriver itself, you can see a mark that indicates the fixing method used. The inscription on the surface 1-6 B10 indicates the presence of a tapered connection. 1-6 is shank diameter in mm, 10 is cone diameter. To remove it, you will need a 10-mm hexagon wrench.
When threaded, the chuck is marked 1.0-11 М121.25. The initial two digits indicate the diameter of the drill shank. The numbers after the letter indicate the thread size. On devices shipped from abroad, the marks are in inches. therefore they may differ from the above.

Description of the dismounting principle
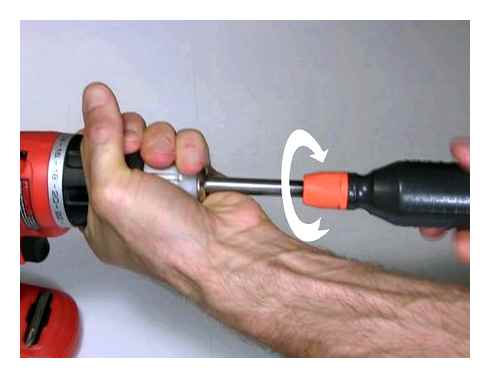
At the beginning you need to widen the chuck so that a screwdriver can go in without any problems. In the end there is a stop screw. Almost every screwdriver has it.
How to Remove Chuck from Electric Drill

Of course, the thread on it is reversed. That is, to unscrew the screw you need to rotate its head clockwise. Only after the setscrew has been removed can the main part of the disassembly procedure begin.
The hexagon socket wrench is inserted into the chuck and firmly clamped. Next, you must set the drilling pressure. It is now mandatory to engage reverse!
Actually, you can also hit the hexagon with a hammer. But it is possible to damage the device. Consequently, it is better to make the hexagon hit something heavy on its own.
You can use anything you like (anything that weighs enough). One blow is enough and the chuck can be unscrewed from the screwdriver by itself.
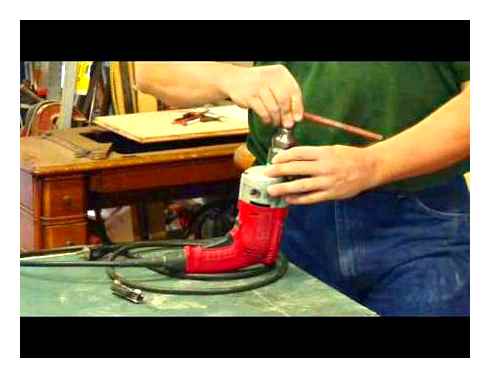
Below is a detailed video instruction on how to remove the chuck from any screwdriver: