How to make a plow for a motor-block by yourself: dimensions and drawings of homemade plows. How to make a reversible and rotary plow? Features of rework and attachment
Proper land treatment is the key to a successful and rich harvest. Even if it is a small garden plot or vegetable garden in a private home.
Digging over a relatively large area with a shovel is a very difficult task. In addition, nowadays special compact equipment for such works is sold. A striking example is a single-axle tractor. And it is possible to buy a plough.
It is the plough to plow land for subsequent planting of potatoes, corn, grains, and more.
Many people rightly decide to make a homemade plough. It is not hard to make. But the element is fully compliant with the requirements.
Advantages of a self-made machine
If the single-axle tractor itself is hardly possible to assemble by yourself, with a plough the situation is completely different.
The main advantage of a self-made plough for a power tiller is that it meets all the requirements. This applies to the share and mouldboard characteristics.
Homemade construction is able to provide:
- the right angle of the blade;
- quality of plowing;
- Depth of entry into the ground;
- The required area to be covered;
- high work efficiency.
It is also an opportunity to make a design that will not overload the engine of the motor block, will not cause slippage, but at the same time will provide high performance.
An important prerequisite for a good plough is the use of quality materials.
Varieties
To assemble a homemade plow, you must first decide on the appropriate type of construction.
There are several variants to choose from:
- Single Tiller. The first option is suitable for working on soft soil. Structurally, a monocoque plough is made up of just one share. The advantage is that it is easy to assemble, and its weight is low.
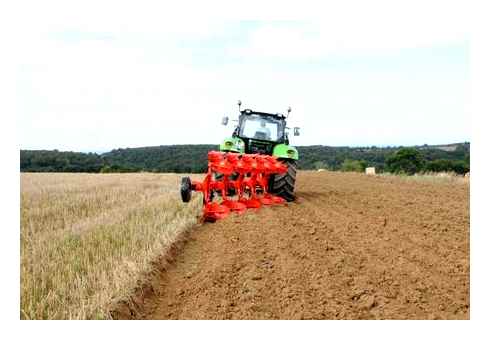
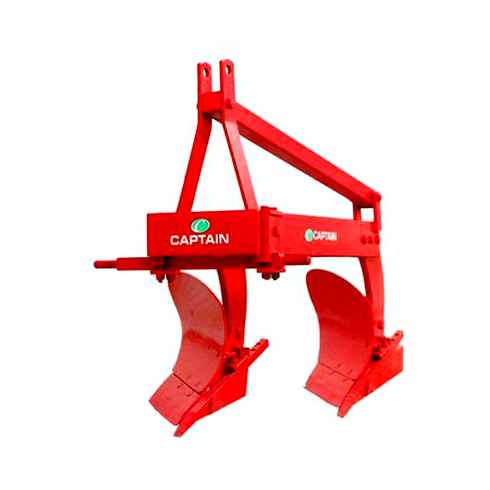
- Two-hulled. It is adapted to work on any type of soil. The only requirement is the absence of stones. Such a plough is effective for making furrows, ploughing and removing weeds. Requires a single-axle tractor with about 5 horsepower.
- Dumping. Here the blade is angled. It allows not just to turn the soil layers, but also to loosen the soil. Topical to use in areas with soil erosion, where rainfall is not often observed.
- Shoeless. This plow is often used to work on smaller plots. There are no-till plows that leave a furrow, and do not make it. The second version is suitable when you want to work the soil in a dump.
- Reversible. Reversible plough. Not suitable for hard-to-cultivate soils. It is very difficult to assemble it by one’s own hands.
- Rotary. This plow resembles a cultivator in many ways. Consists of several specially curved plowshares. Mounted on a common axle, which moves when starting the power tiller and then turns the soil. Cultivates a piece of land up to 300 mm deep. This is a very popular solution for countrymen working the grounds, garden, and removing weeds.
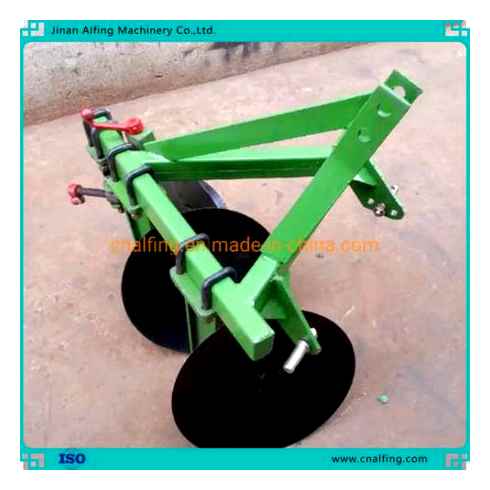
- Disk. This plough is used for tilling and wet soil processing. Has a fairly small processing depth.
It is necessary to determine the choice in advance and proceed to the assembly of the most suitable plow design for a single-axle tractor.
When choosing the type and design of plow, be sure to take into account the power indicators of the power tiller and the area of cultivated land on the plot.
It is a good solution to look at available options plow, consult with experts and based on their recommendations, choose the appropriate drawing to create your own attachments for single axle tractor.
Assembling it with our own hands
Now to the question of how to make a plough for your power tiller with your own hands.
This is a step-by-step work, where it is important to approach each of the steps carefully.
Decide on the characteristics and dimensions of the plow for your power tiller in advance. Consider single hoe plough with ploughshare and mouldboard as an example. This is the most popular design.
Drawing and components
Find various drawings that can be used to assemble a homemade plow for your existing power tiller. There is an option to draw everything from scratch. But here you need some skills and experience.
Structurally, the version of the attachment under consideration consists of:
- the plough;
- frame;
- handles;
- drawbar;
- wheels;
- crosspiece between the handles;
- axle;
- the pivot fork to the frame;
- drawbar handle;
- T-joints, etc.
Also here you will need fixing screws, sleeves, locknuts, distance washers and other elements.
To successfully and independently make a full-fledged plow to work the power tiller, it is necessary to adhere to the plan, follow the instructions and start from the parameters of the selected drawing.
By allowing minor inaccuracies, many people think it’s no big deal. The wheels; the grips; the wheels; the handles. But what is their disappointment when the design does not meet expectations at all. The plow does not do its job properly, the single axle tractor gets overloaded, and all sorts of other mishaps occur.
If you do not want to take risks, you can always buy a ready-made plow for your technique type Neva on a single-axle tractor. But if you are confident in your own strength, then get to work.
Assembling the frame
Having made up your mind to assemble the plough with your own hands and then mount it to a Neva single axle tractor or other brand of equipment, try to act consistently.
At the first stage, the frame is assembled. For its manufacture it is better to take a strong tube of metal. Look for cross section of about 52x40mm. The wall thickness of the pipe must be at least 7 mm. Otherwise it won’t be strong enough.
- To make the fork, the wide walls from the frame are cut off and placed against each other.
- After measuring the frame, mark the middle part of it. This is where the cross-beam will be installed.
- Here are the eyebolt posts to be welded. They’re needed to attach the drawbar.
- Leave a hole in the front part of the frame where the fork starts. It is tightly welded. This prevents the soil from getting there during work.
Assembling plough
Assembling plough. this means installing hitch (hereinafter hitch) on plough. Plough and hitch must be assembled for subsequent mounting of plough onto single axle tractor.
Prepare everything you need for work. plough, hitch, wrenches.
To ensure optimum ploughing depth match the hub opening (B) to the middle hole in the plough leg (A) and put them together with the attachment bolt (C).
The attachment bolt for the adjustment bolt (B) must be inserted into the upper hole in the plough leg (A) and secured with a nut.
Important! All nuts at the hitch and plough attachment points do not need to be fully secured, since the secured nuts will have to be loosened when carrying out plough adjustment work!
So, after installing the hitch on the plow, you can proceed to the next stage of preparation of the power plow.
The plough can now be mounted onto the single axle tractor. Connect a plow to a power tiller with one or two (depends on a power tiller model) pins (A). Fix the pins with cotter pins.
How to make a plow for a motor-block with your own hands?
You can also make a plow for the power tiller yourself. This saves you a lot of money. For this you will need tools and materials, which are in the garage of every owner.
First make a drawing. Without it you might have problems and you will end up with nothing.

Plowshaft
You need a piece of steel, around 5 millimetres thick. You can make a removable share from a circular saw blade. The working part of the piece, which will cut the ground, should be machined on an anvil, and then sharpened.
The mouldboard
You will need a pipe with a diameter of 0.5 meters. The wall thickness should not be more than five millimeters. The part is cut out on a pre-made blank of cardboard, also machined on an anvil and sharpened.
Then assemble the parts. For starters, you can do all this with cardboard blanks. And if all the parameters will be observed, and the plow itself turned out correct and reliable, then you can proceed to the metal parts.
How to Adjust a Homemade Plough? Just like a factory-made. The difference is that if you work incorrectly, you can bend and tweak parts with a hammer yourself.
Factory plough for Oka motor-block. Basic characteristics, parameters, and application
A hinged plough for a motor-block is a universal agricultural implement, without which high-quality land treatment is simply impossible. Since its invention, it has been used by man to prepare the soil for further work. The process of working with the plow is called plowing.

Nibbi AE 11 two wheel tractor plowing Aldo Biagioli & Figli Single furrow plough 3
During plowing, the upper layer of soil is turned, it becomes softer, weeds go into the lower layer of soil, and the upper layer becomes prepared for sowing crops.
Kaluga manufacturer of motor equipment. JSC “Kadvi”. offers manufacturers not only motor blocks and cultivators, but also attachments for them. For example, for the popular motoblock “Oka” and its modifications, the manufacturer recommends using a plow with a hitch.
| General characteristics | |
| Weight: | 7.8 kg. |
| Overall dimensions: | 535 mm/310 mm/410 mm. |
| Working width: | 190 mm. |

It is recommended to use the plow for the motor-block “Oka” for plowing or fertilizing the soil. The device is designed to work on soils with an area not exceeding 0.4 hectares.

How to make a disc plough on a single axle tractor?
The disc plough is a very useful tool to prepare even furrows for planting potatoes and other tuber crops. Before proceeding to make such a plow, study the drawings. According to them you will be able to control the course of assembly and avoid mistakes. The procedure for making a disc plow on a single-axle tractor is as follows:
- Supporting angle acts as a basis of the plough. To make it, use an equilateral angle, the shelves of which in the cold state should converge at an angle of 70 °;
- Weld the toe to the angle. Then weld the heel through the stop bar;
- Fix the flange to the support bracket with the loops. The distance between the angle and the jaws must be such that when the jaws open, their end faces do not touch each other;
- Weld the swivel mechanism to the stop angle so that the supporting part of the mechanism is perpendicular to the angle.
Finally, adjust the plow’s cheeks. To do this, clamp each one in a vice and turn it in such a way that it is bent in the opposite direction to the other.
Rotary plow on a single axle tractor. peculiarities of making
A rotary plow for a motorized tractor with a support wheel is the most sophisticated type of attachment used today for plowing. You must be very careful when working on it, because the slightest mistake will cause a poor quality of groundwork. The procedure for making it is as follows:
- As the working body is a cutter, which can be made from a steel tube and metal plates. The plates must be welded to the tube so that when they rotate, they grind the soil and throw it away to the side;
- Next, make a frame for the plow’s gearbox. It can have any shape, the main thing is that moisture and debris do not get inside the gearbox;
- It is not possible to make a gearbox. it must be purchased. After that, the mechanism should be connected to the gearbox of the motor-block;
- Since the rotary plow is a rather oversized design, it will require separate wheels for its use. It can be taken from an old moped or motorcycle.
The finished plough on a single axle tractor will serve you well for more than a year. The main thing is to change the oil for gearbox lubrication in time.
How to make a plow for a power tiller with your own hands from a horse-drawn plow. how to make it with your own hands?
Unlike other types of attachments, the horse-drawn plough can be made almost entirely out of wood. The only metal part is the ploughshare, as the wooden element will deteriorate rather quickly due to regular tillage. The algorithm for making a plow is as follows:
- First take two wooden planks, about 10 cm thick, which will be used to make the handles. Put the rubber pads on top of the handles;
- Join the handles together at right angles so that you can grasp them firmly with both hands when plowing;
- Connect the lower parts of the parts by means of self-tapping screws;
- Take another 20 cm thick bar. It should be curved so that its upper and lower ends are parallel to each other;
- Fix a ploughshare to the lower end;
- At the upper end install a hitch, which can also be made from small wooden bars;
- In the middle, fasten the twin part of the handles.
Despite simple design, horse-drawn plough shows rather high efficiency. True, it is rather dangerous to use it for plowing wet soil, since the wooden elements can simply break from the weight of the soil.
Regardless of the method you choose to make a plow, each of the homemade designs can be used to work with Mole, MTZ, Salut, and Neva MB-1 and MB-2 power tillers.
Plow on a single-axle tractor: a review of popular models and their characteristics
Industrial modifications, although inferior to homemade analogues in the amount of costs, but are highly reliable and durable. On the modern market there are many different models, which differ not only in terms of soil quality requirements, but also in the technical parameters of the power unit itself.
Plows on a single-axle tractor “Salut”
“Salut” is a well-known brand of cultivators and power tillers. Thanks to the plow, the soil can be plowed to a depth of 25 cm. Function with such varieties of plows:
- The Neva plow is the most heavyweight one among the ones under consideration;
- Single-hoe without coupling, the weight of which is 9.55 kg at a plowing depth of 200 mm;
- Zykov rotary plough with weight of 9 kg, which loosens 20-25 cm of topsoil.
Ploughs on single axle tractor “Mole”
Mole cultivator “Mole” is known in several modifications. MK-1 and Mk-2, both perfectly compatible with universal reversible plows. For better traction it is necessary to buy additional grousers.
FARM SHOW. Single Axle Remote-Controlled Tractor
Technical characteristics of the plough “Mole”:
Plows for “Neva” power tiller
single axle tractor “Neva” has several basic modifications, including MB-1 and MB-2. They differ in power and transmission. For this reason, they come with different adapters.
MB-1 is compatible with universal single-hulled plough without coupling, as well as P1 20/3 model. The latter captures a row width of 22 cm and is adapted to over-compacted soils.
Plow for MTZ motoblocks
Ploughs can work with MTZ-09H motocultivator and other modifications of the manufacturer:
- Universal turnover plough PU-00.000-01, which is made of steel and has a specific shape of a ridge;
- P1-20/3, smaller in size than the previous one;
- Reversible double-sided plough with a feather share. Together with such a plow, a single-axle tractor can operate at a speed of 2-5 km/h.
The universal plough of PU series is widely known. Its features are:
- low weight;
- easy transport;
- fastened with a conventional hitch;
- track width of 30 cm;
- Adjustability of ploughing depth, which max. can be 25 cm.
In addition to those indicated above, ploughs for motor-block with support wheel, which are adjusted with screw mechanism, are very popular among consumers.