How to remove the drill bit from a Makita perorator?
There is a fairly simple device on the peorator for mounting and dismounting the drill. Simply press the bit head all the way down and then freely extract the bit with your other hand. Then let go of the drill head. You can reinsert the drill bit in the same way.
It is necessary to clamp the drill in a vice and then slowly loosen the drill bit by pulling it toward you. Clamp the socket in the large clamping ring and secure it in such a way that it does not damage the housing. Then use a pipe wrench or a small vice to clamp the bit and hit it with a hammer and knock it out.
How to remove the drill bit from the chuck?
If the chuck will not turn by hand or with a wrench, put a Phillips screwdriver in the drill hole and turn the screw inside the chuck counterclockwise. This should be enough to loosen the chuck and unscrew it. After turning the chuck, replace the drill bit.
- Remove the rubber tip from the end.
- Use a screwdriver to remove the first circlip.
- Pull the plastic cover of the sleeve down.
- Remove the second retaining ring.
- Remove the sleeve cover.
- Remove springs, retaining plates and balls.
Drill bit jamming varieties and causes
Before pulling out the drill bit, we must first find out what caused it to jam. The causes largely depend on the situation itself. There are two main variants of the appearance of such a problem:
- Jamming occurred directly in the adapter chuck. Quite often it happens with models from Bosch, Makita or Hammer.
- The drill began to get stuck in the drill chuck. This is often encountered by people who use Vikhr and Aeg models.
In the first case, the problem occurs when ordinary drills are used to work the pen. They have to be inserted into special adapter chucks. But even with them, people can not properly remove the drill. Most often it happens because the chuck itself can get jammed. To avoid this, it should be regularly lubricated and cleaned of debris.
In the second case, the auger gets stuck in the drill bit chuck and cannot be extracted. This occurs when there is a prolonged heavy load.
Causes
There are several main reasons why this fault could occur.
Among these, the two most common ones can be distinguished:
- Drill bit jamming in the chuck or in the buffer element (this is used when installing a conventional peorator bit);
- Drill bit jammed in the clamping piece of the chuck.
In the first situation, the malfunction occurs due to the need for a drill that is necessary for the operation of the device. To insert it, a special element is used. a transitional clamping chuck (the same part is used for an electric drill). It is usually placed in the clamping element of the peorator, and then start working.
When the work is finished, it may be difficult to remove the bits because they are tightly clamped by the jaws of the clamping hole. In this situation, there is a simple and quick solution, because the problem arises from improper operation of the clamping mechanism. Many users forget (or simply do not know) that it requires periodic lubrication. That’s why it jams.
The second situation occurs because the element is jammed in the chuck itself. The electric drill bit rotates in a circle and reciprocates in some devices. This occurs because the tool body transmits the impulse through the bottom of the chuck and the jaw.
But in the rotary table the energy is transferred on a different principle and therefore the nozzles move on a different trajectory. This tool assumes rotational-impact and percussive motion vectors of the tool. The tool receives its energy from the striker, which moves when the power unit, which is connected to the electricity, starts to work. This bit acts on the shanks of the tools inserted in the chuck with mechanics (drill, drill bit, chisel, crown).
There are special grooves in the tool bit which are reliably retained in the clamping element. This allows them to transmit the torque. Cheap bits are generally made of low-quality materials and soft alloys that cannot be heat-treated. This renders the tails unsuitable for further use because they can no longer take the strain. In this situation it will probably be necessary to dismantle the tool completely.
How to remove a jammed drill bit from a rotary screwdriver?
The most common method is to use a Phillips screwdriver or a nail of suitable diameter, which is inserted into any of the available cavities on the chuck, thereby fixing the first half of it. You can try turning the other half by hand.
How to remove the drill bit from an electric screwdriver?
To do this, turn on the electric screwdriver in reverse rotation mode, hold the outer chuck body and press the “start” button. That way the drill bit is easily released. In the absence of a special key, the drill bit can be removed with a Phillips screwdriver or a nail.
You can take a spare tool (a good drill or a rotary tool) and drill a hole near where the drill is stuck. Then loosen the jammed drill bit by gently pulling out the drill bit and taking care not to break it. 3. If the first two methods do not help, it is worth using a gas wrench.
How to get the broken drill bit end out of the chuck
When a drill bit, auger or other accessories with an informal tip (e.g., SDS instead of hexagonal) are driven into the chuck, the tip breaks under heavy load and especially if the steel is of low quality. It happens especially often with peorators. the tooling collapses where the balls grip it.
It is very difficult to remove it. An awl, a screwdriver, or a magnet with superglue are of low effectiveness. The riskier way is to add a generous amount of oil to the awl.
Without disassembling the torch and the cartridge, the splinter can be removed in two effective (but not safe) ways.
- Clamp the torch in a powerful vise with the chuck upwards.
- Remove the gasket, stopper and other washers-nuts if necessary, or simply pull the cartridge down.
- Insulating shell of a powerful wire (not less than 7 mm in cross-section) should be put into the maximum opened cartridge afterwards.
- Secure one terminal of the welder to the body of the torch.
- The second terminal to grab a long rod or a stinger for welding (section. less than the insulating tube).
- Put the stinger on the splinter in the cartridge and give a short discharge.
- Pull the rod together with the splinter.
This is a very quick method if your acquaintance or your own tools have a welder. If not. it is hardly possible to find an analogue. Another disadvantage that has been noted on the forums is welding seams that can randomly form in both the chuck and the rotor. Such chucks later cause the tool to break down.
In doing so, the splinter of the drill shoots out (and where it will hit is unknown). The method is fast, but before the “muzzle” of the drill you should put something that would dampen the impact of the “projectile”, otherwise the ricochet could easily cause injury or break something around.
READ How to Insert the Nozzle into the Peorator
How to rescue a quick-change chuck
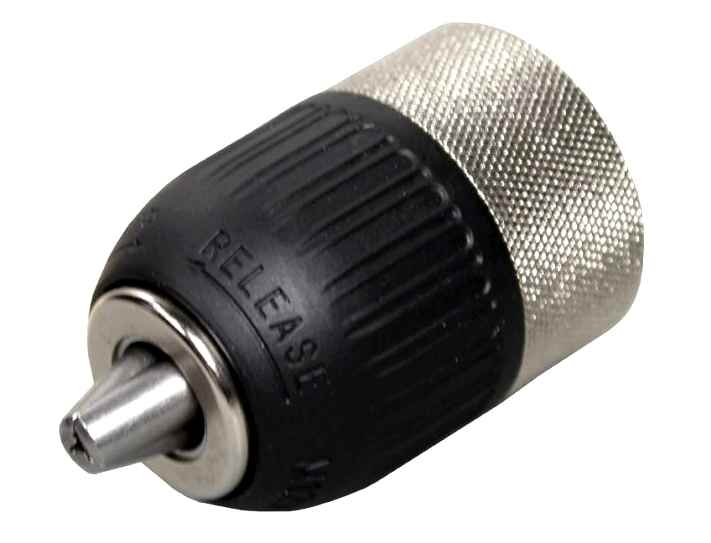
Quick-action chucks are often used in modern rotary tools Most rotary tools and screwdrivers are fitted with a special quick-action chuck. Their main feature is that they use a retaining ring instead of a rotating sleeve. To remove a jammed drill from such devices, you need to perform the following steps:
- Carefully remove the o-ring at the top and pull the cartridge down. Lift chuck with pliers and pull it out carefully.
- Take out the tube that leads to the chuck. This is done to get to the drill end.
- Drill out the metal tip. It is necessary to use quality drills for working with metal. They must be diamond or cobalt plated.
After performing the above steps, the drill bit should come out of the chuck without any problems. It is worth noting that this method of extraction is considered the most effective. With his help, it will be possible to get the drill, even if it is strongly riveted during the work.
Important! If you yourself can not get the stuck part, it is better to entrust this work to a specialist. He will help to quickly solve the problem.
The drill stuck in the wall: how to pull out?
In some cases, the drill can be permanently stuck in the wall or any other surface of structures made of reinforced concrete. In most cases, such trouble happens if the hole is drilled at a slight angle of 6 centimeters. There are several ways to remove the tool.
Instructions
The first thing to do is to check if the torch has a reverse rotation function. If you have one, you need to turn it on and, swinging the tool from side to side, pull it out of the wall.
In addition, you can arm the drill and make another hole not far from the existing one, and by loosening the drill remove it from the construction.
If the above actions did not help, you will have to use a gas wrench. If it is too large, a steel plate can be used as a spacer. The key should be screwed on the drill and beat on its handle with a hammer from the wall. These movements are not the most convenient, but the method is quite effective.
To remove the auger you can also use a backhoe hammer, which can easily be found at any auto repair shop. If this tool is not available, you can connect the torch to the sds socket of the bit and pull it away from the surface you are working on. This method is effective when the drill is stuck to a depth of no more than 10 centimeters.
If you are drilling through a wall and are close to the end of the process, you can break through the stuck tool with a hammer. The hammer should be used in the direction of drilling. It is important to remember that it is impossible to hit the nozzle itself. you must use a board or any other pad to soften the impact on the drill.
To avoid these problems, it is sufficient to remove the drill bit and the drill hole as often as possible and to clean it of dust, concrete fragments and other contaminants. Also, the drill or other nozzle can jam in the surface if too much pressure is applied to it, so the tool should be held lightly. If the construction is reinforced concrete, that is, it has metal reinforcement, there is a risk that the drill will get stuck in it. Therefore, before you begin these works, you should check the location of these metal elements with a special device.
In some cases it happens that the peorator is jammed. As a rule, it happens due to the use of cheap, low-quality tools. In such products fasteners can not withstand the load and are deformed. In some cases it is enough to clamp the tool in a vice and try to unscrew it. In the most complicated cases it is necessary to disassemble the chuck. To do this, the first thing you must remove the upper rubber product, as well as the retaining ring that is located underneath it.
How to change the drill bit in a drill. do it yourself!
It is not always possible to take the drill out of the chuck by usual means. it can jam the chuck as a result of a heavy load or improper fixation. So how do you remove the drill bit from the drill without damaging the fixture and the tool itself?? First of all, try to cool the chuck down sufficiently. Sometimes it is already enough for the jaws to release the drill a little so that you can pull it out.
The most proven method for extracting a jammed tool is the tapping of the jaws. For this purpose, the free end of the drill is fixed in a vise, a wooden bar is attached to the chuck, through which the tapping is carried out. This vibration can cause the chuck to loosen its grip and free the tool. Both owners of classical fasteners and owners of quick-change fasteners will find this method useful. Sometimes extraction becomes possible after lubricating the drill with machine oil or the popular WD-40 lubricant.
The latter method is better, because the atomizer will get to the right contact points between the drill bit and the chuck faster. In any case, it is necessary to wait a little after lubrication to allow the substance to penetrate deeper. Sometimes, in especially difficult cases, the problem is solved only after dipping the entire chuck in machine or vegetable oil. If neither is handy, you can make a “bath” of your drill with gasoline as well. Keep the chuck in the liquid for at least an hour. By combining the methods you will get the jammed drill bit out even faster.
The drill stuck in the wall: how to get it out?
In some cases, the drill can be permanently stuck in the wall or any other surface of structures made of reinforced concrete. In most cases, this trouble happens if the hole is drilled at a slight angle of 6 centimeters. There are several ways to get the tool out.
Instructions
The first thing to do is to check if the torch has the reverse rotation function. If there is one, you should switch it on and swing the tool from side to side to get it out of the wall.
You can also use a drill to make another hole close to an existing one and remove it from the construction by loosening the hammers.
If the above actions did not help, you have to use a gas wrench. If its size will be too large, you can use a steel plate as a spacer. The wrench should be screwed on the drill and hit its handle with a hammer from the wall. These movements are not the most convenient, but the method is quite effective.
To extract the drill, you can also use a reverse hammer, which is easy to find in any auto repair shop. If this tool is not available, you can connect the peorator to the SDS connector of the nozzle and yank it away from the surface to be drilled. This method is effective when the drill is stuck to a depth of no more than 10 centimeters.
If the drill gets stuck in the wall while you are drilling through and there is not much time left, you can break through the stuck tool with the sledgehammers. The blow must be made in the direction of drilling. It is important to remember that it is impossible to strike on the nozzle itself. it is necessary to use a board or any other pad to soften the impact on the drill.
To avoid these problems, it is enough to remove the drill and the drilled hole as often as possible and clean it from dust, concrete fragments and other contaminants. In addition, the drill bit or other nozzle can jam in the surface if too much pressure is applied to it, so the tool should be held lightly. If the construction is reinforced concrete, ie, it has a metal reinforcement, the risk is that the drill will get stuck in it. Therefore you should check the location of these metal elements with a special device before starting this work.
In some cases it happens that the core drill is jammed. Usually it is caused by using a cheap, poor quality tool. In such products, the fasteners can not withstand the load and are deformed. In some cases it is enough to clamp the tool in a vice and try to unscrew it. In the most complicated cases, you may have to disassemble the chuck. The first thing to do is to remove the upper rubber product, as well as the retaining ring that is located underneath it.
Ways that can help pull out the drill bit
It is possible to get the stuck drill bit out by clamping the drill in a vise and pulling the drill bit out by loosening it.
The design of the peorator chuck involves moving the drilling (drilling) tool down the barrel. When the riveting (increase in diameter of the opposite side of the drill) occurs, the barrel does not allow the drill to come out freely. This is the most common cause of the problem. Trying to extract the tooling can be done in the following ways:
- Clamp the jammed drill in a vice on the workbench, and then, wiggling the tool from side to side, pull it toward you.
- Clamp the drill directly in a large bench vice so as not to damage its body (rubber pads can be used). The auger is then clamped with a n°1 gas wrench or small vise, and a copper hammer is used to tap on the auger. The direction of impact must match the chuck ejection direction.
In both methods, you can use penetrating fluids. In rare cases, the cause of jamming is operation without lubrication and clogging. If there is scale or hard stone underneath, the stone fixing ball can fail to release the drill. To prevent this from happening, you must always lubricate the drill shank in the future.
If the drill bit jams as a result of rotation in the chuck itself, it is necessary to dismantle the chuck components by removing the rubber cover and the retaining ring. Or try to turn the drill back by 90° (the direction of the turn can be seen from the notches on the drill bit and chuck jaws). Drill bit twisting usually results in later replacement of the jaw components.
It should be noted that during long-term work with low-quality tooling, a strong deformation of the shank occurs, so the proposed methods do not release the drill.
In this case, it will be necessary to disassemble the rotary table completely, and then use a hammer to dislodge the stuck drill bit. As a result of such an operation will require the replacement of the tool barrel. Many machines have an individual disassembly layout, so it is desirable to find the assembly drawing of all components. Nevertheless, if you do not have locksmith skills, you should not perform disassembly and repair of the barrel unit. In this case it is better to apply to a workshop.
It is possible to pull out the drill by the suggested methods after the first 2-3 strokes of adequate force. If there is no visible movement, the subsequent attempts to knock out the drill bit may cause damage to the rotary table.
Removal of the jammed drill
There are several ways to get the drill out of the peorator. It is necessary to fix the head in the workbench vice and then, loosening the tool from side to side, pull it toward you. There is a second variant of solving the problem. Before pulling the auger out of the drill with the gas wrench, the tool is fixed in a vise. Next, several hammer blows with a copper hammer should be made on the keyed nozzle. The direction of impact should coincide with the vector of the drill bit coming out of the chuck.
Since contamination or lack of lubrication is often the cause, special penetrating fluids can be used. They allow the tool to work properly and extend its service life.
The drill bit can also get jammed because it is twisted in the chuck. In such a case, the elements of the chuck must be removed, but you can simply try to turn the bit in the right direction. But if this is the case, you will need to replace the parts of the clamping mechanism.
Recommendations for avoiding such cases
wide holes in the wall prevent the drill from jamming To avoid such problems, it is necessary to use only quality drill bits from well-known manufacturers. The matter is that such unpleasant situations most often occur with fake products. That is why you should not skimp on drill bits. It is better to pay more so that you don’t have to pull out jammed drills in the future.
To check how good the drill bit you bought is, it is necessary to make some holes with it. If it passes through the shank without any problems, then the product is really reliable and it can be used in the future.
Often people encounter jamming when using unsuitable drills for working with certain surfaces. In such cases, even high-quality parts fail to cope with the load, deform and jam. Therefore, before you start work, you should familiarize yourself with the purpose of the drill and determine what materials they are suitable for.
Drill bit jamming is a widespread situation encountered by many people who regularly work with a rotary tool. To quickly cope with such a problem, you need to familiarize yourself with the main ways to extract the jammed part and understand why this can happen.
Easy etching of the chip with nitric acid
There are situations when a piece of drill bit gets stuck in the hole and cannot be removed using the above methods. Nitric acid can help in these particularly difficult cases.
Concentrated nitric acid reacts vigorously with many metals, causing rapid corrosion and degradation. Aluminum is an exception. Alloys from which drill bits are made are not so resistant to nitric acid. This property is used if a stuck chip is to be easily extracted from an aluminum piece.
The following tools and materials will be needed to perform the reaction:
With any suitable tool from the hole try as much as possible to remove the aluminum chips, which can clog the screw groove of the drill and do not let the acid penetrate deep into the hole.
Then something between a cup and a funnel is molded from plasticine, which will hold the acid over the hole and will not let it flow.
A plasticine cup is placed over the hole with a stuck drill bit. Acid is poured into it. The part is left for several hours.
“That’s how I got the chip that I couldn’t loosen or get out with the pliers. Literally overnight the nitrogen ate almost all of the drill bit, there were pieces left that I just shook out. The aluminum was perfectly intact and was not damaged in any way”.
- An indication that the reaction is active are the bubbles on the surface of the nitric acid. If the reaction is weak, you need to heat it up a bit with a construction hair dryer.
Etching is used in such cases quite often, but not always successfully. Some masters complain that they can’t get the desired effect for several days. This could be due to two problems:
That’s why it is recommended to pre-clean the screw grooves of the debris as much as possible and use a plasticine funnel. If you drop a few drops on the drill bit, there will be no active corrosion.