Chuck replacement and troubleshooting options
In the household, the most popular tool is an electric drill. In recent years, especially popular are electric drills, called peorators. This tool allows you not only to drill a hole, but also to use bits for tightening nuts, self-tapping screws, screws. An electric drill is a reliable tool and seldom, if ever, fails. How to troubleshoot power drills. The main faults in electric drills are divided into mechanical and electrical.
The failure of the chuck can be attributed to the frequently occurring mechanical malfunctions. And how to remove and replace the chuck from an electric screwdriver? Immediately note that the replacement of the chuck on the electric drill, electric screwdriver, peorator is absolutely the same. Chuck failure is most commonly caused by worn jaws. This is the most serious malfunction of an electric drill. One can’t do without replacing the complete chuck. And how to remove the chuck from the drill will show video.
By the way! the resulted way of replacement of a chuck is suitable for any modern models not only electric drills, but also peorator, screwdrivers as all resulted designs provide exactly such way of fastening of a chuck.
In Soviet-made drills, on the other hand, the chuck is held in place by a Morse cone and screwed in. And how to remove the chuck from the cone? You can use a bearing puller for this or use a hammer to tap it in.
Attention! If you buy a new power tool with a chuck, be sure to remove the chuck and carefully lubricate all mating parts and threads.
N8vfY1. To disassemble the core drill, check that the core drill cable is disconnected from the powerpack. Use a spanner to extend the cams in the chuck until they are as far apart as possible. If you look inside the opened chuck, most often you will see a screw designed to fasten the cam chuck to the motor shaft. A Phillips screwdriver is suitable for breaking out a screw. Remember! The fixing screw has a left hand thread and can be unscrewed by turning it clockwise with a screwdriver. Unscrew the screw, insert in the chuck in place of the drill L-shaped hexagon wrench and clamp it.
If the flat of the screw is worn out and you can’t use a screwdriver to remove it, proceed like this. Take the second drill, put a drill bit the diameter of the screw head in it and start drilling out the screw. You will end up with a screw that unscrews as you drill it out.
Insert the open-end wrench on the motor shaft at the base of the chuck. There are models where the clearance between the chuck and the housing is very small. You have to match or saw the thickness of the wrench. A wrench is needed to secure the motor shaft. Earlier models have no key slots on the shaft. In this case, take apart the body of the drill and remove one cover. Clamp the chuck shaft pinion and cooling fan at the same time and with a sharp counterclockwise movement try to unscrew the chuck.
But back to the wrench option. Now, after putting the drill on a wooden flat and fixing the shaft with a wrench, hit with a wooden or rubber mallet on the protruding tail of the hex key counterclockwise. The chuck is screwed onto the shaft. Rotate the chuck counterclockwise and remove it from the power drill. If you do not have an L-type hex wrench, you can use a drill of suitable diameter that fits into one of the three holes for the clamping wrench.
Inspect the chuck. If the cams are completely out of order, replace the chuck on the drill with a new one. Insert a new chuck onto your drill in reverse order. Remember! When installing a new chuck, be sure to grease all rubbing parts. This is especially important with screw-type chucks.
This is the case we looked at when you need to replace a cam chuck. But power tools are also available with quick-action chucks.
Quick clamping chucks allow you to replace the drill in seconds without using any additional tools or fixtures. Quick-action chucks are divided into a single-socket and a double-socket chuck. The 1-rod chuck design has a special locking mechanism that locks the shaft when a tool is being changed. One-handed operation is possible. With a double-clamp chuck, the tool change is done with two hands. One hand holds the first socket and the other hand twists the other socket. But quick-clamp designs do not securely fasten the tool, especially in percussion mode. And using plastic to make them often leads to cartridge breakage. The cam chuck is more reliable, and the parts used in it are made only of metal. Special clamping wrench must be used to fasten the tool.
Ways to remove a quick-action chuck from a drill or power screwdriver
The chuck is screwed onto the shaft and secured by a clamping screw. Quick-action chuck can be removed using the same algorithm as the cam-action chuck. First unscrew the locking screw clockwise. If you have on the shaft near the chuck flats for the key, putting the key in the grooves, clamping in a chuck of any lever, try to unscrew the chuck by turning it counterclockwise. Reverse the above procedure for installing the new chuck.
But the chuck can also be repaired In order to inspect the parts of the chuck, it must be disassembled. Proven and reliable way of dismantling an electric drill chuck.
Take an ordinary pedal, remove the dust cover from it and insert the adapter. The adapter can be made from a defective impact drill chuck. The adapter is a drill shank with a cut-off drill bit. Put the chuck on the adapter shaft and press it with a rubber damper or a wooden board. Before installing the chuck on the adapter, you must drive the cams inside the chuck until they are fully immersed.
After reassembling the construction, operate the torch in impact mode. After 3 to 5 seconds the cartridge should unscrew. Immediately mark the cams and their locations in different colors. Now you can begin to inspect and defect the chuck. If necessary, the cams can be replaced with new ones. But this does not require re-boring the cams on a lathe. The other parts can easily be replaced if they are available.
But there are other mechanical malfunctions There are cases where the failure of the electric drill is caused by gearbox failure or poor bearing operation.
To get to the gearbox, you need to disassemble the plastic housing of the electric drill. After removing the housing cover, release the chuck shaft and remove it. A larger diameter idler pinion is mounted on the shaft. A small-diameter spiral pinion is mounted on the motor shaft. In the gear housing there is a bronze bushing, which most often leads to the failure of the drill. This occurs through a considerable amount of wear. Check bushing dimensions and have it turned by a turner. Use bronze as material, but also caprolon may be used. When replacing the bushing in the gearbox, be sure to check the bearings, their tight fit and their packing with grease. If the gear teeth are very worn, they need to be replaced. Gear teeth will wear out if the bearing sleeve fails. The larger diameter idler will wear most often. Its replacement is simple, just remove the snap ring and the key. The old pinion must be removed from the chuck shaft. You can use a puller, or you can just gently tap with a hammer on wooden supports.
Electrical faults Let’s now have a look at the typical electrical faults of the drill. often the electric drill is interrupted by worn brushes.
1.Brush replacement in an electric drill To change the brushes remove the side cover of the body of the electric drill by loosening the fastening screws. There should be at least 7 brushes. The housing is removed by gently prying at the edges with a screwdriver. After opening access to the motor, you will see two boxes, which are installed brushes. To get the brushes, you need to loosen the boxes, bend holders and remove the worn brush. Do the same with the second brush. Install new brushes in the vacated places, wipe the contact space with a clean rag soaked in white spirit.
2.Electric Drill Power Cord Repair One of the unpleasant faults is the intermittent stopping of the electric drill while working. Most often this happens because of an arbitrary loss of power. And the thing is that when the power cable enters the body of the drill, it experiences various loads, which leads to a breakage of the wires.
To remedy the fault, you need to remove one of the side covers of the housing. Check cable continuity with a tester. If there is damage at the cable inlet in the enclosure, but the damaged piece is cut off from the cable, a 20 cm piece of rigid chlorvinyl tube is put on the cable and the cable is installed in place and then connected.
To replace the button with speed regulator just remove the housing cover, disconnect wires from the regulator. The new speed regulator is installed in the same place and connected according to the diagram. If you do not have a diagram, you must draw a wiring diagram before you remove the old regulator.
3.Sparks within the enclosure Sparks within the enclosure are often caused by an inter-turn short circuit in the armature winding. Second cause of arcing, contaminated surface of the manifold lamellae. Inter-turn short circuit can only be determined with a special instrument. It is possible to remove the dirt from the collector part by yourself, for example with fine sandpaper. After deburring, it is necessary to carefully remove dust from the grooves between the contact plates, called lamellae. The best way to do this is with an old hacksaw blade. On completion of the work, the anchor must be checked with a PPJ device.
Drill chuck: construction and varieties
A large proportion of drill models are equipped with what are known as cams. This version is a hollow cylindrical body, on the surface of which there is a movable part in the form of a ring or an adjustment sleeve. One base of the cylinder is fixed on the shaft of the drill. A second base is used to clamp the jaws. The rotation of the adjustment ring causes the cams, made of metal, to move. The convergence and removal of these cams depends on the direction of the ring rotation.
To attach the blades to the shaft, the body has a special tapped hole or a special tapered surface. There are also types of chucks that are best suited to equip specially designed models of peorator. It is possible to remove and change it yourself. Junction type drill chucks with jaws let you fasten bits and shank within the standard range of 0.8-10 mm and 1.5-13 mm.
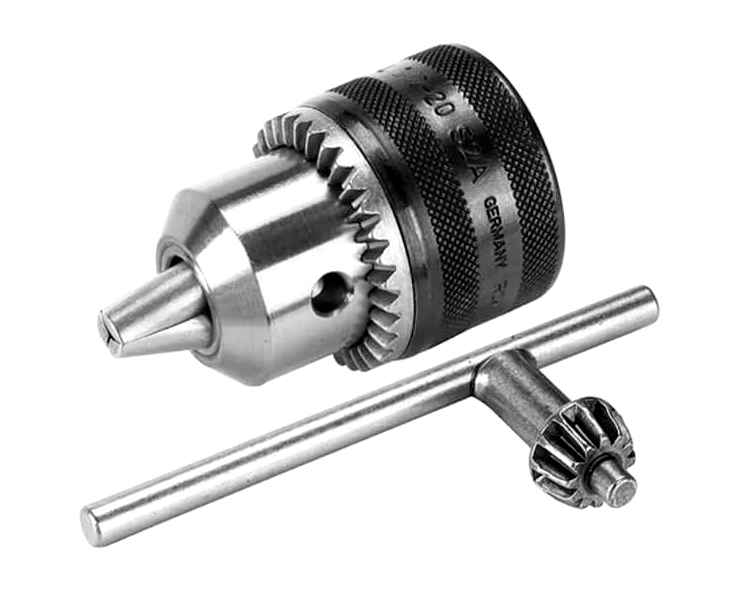
In order to ensure maximum reliability when fastening, it is very important to tighten the cartridge with considerable force. Cam chucks can be:
To tighten or loosen the adjusting ring on a “normal” device, you will need to use a special wrench.
Ways of fastening chucks
There are two types of drill chuck mounts in handheld drills:
Look closely at the metal rod between the body and the chuck. In the case of a threaded fit, you can usually see the slits for a wrench, and a tapered shaft is always smooth.
About the method of attachment speaks and the marking stamped on the chuck:
Chuck fastening methods
In handheld drills, two types of drill chuck fastening are used:
Look closely at the metal rod between the housing and the chuck. In the case of a threaded fit, you can usually see the slits for a wrench, and the tapered shaft is always smooth.
The marking on the chuck also shows the fastening method:
Characteristics of the quick-action drill chuck
The standard quick-action chuck is not too complicated. Tightening and loosening will require the use of a special metal sleeve that has a knurling or grooving. Often a plastic sleeve with ribs is used for this purpose.
The main difference between this element is the absence of a clamping wrench and the use of an outer shell that allows the jaws of the drill to be clamped. Most often the use of DSP is accompanied by the following problems and difficulties:
In the case of the SDS screw on the peorator, the procedure is as follows:
- Remove rubber gasket;
- Use a flat screwdriver to remove the first retaining ring and washer;
- the second ring is removed after lowering the shroud down by analogy, as for changing the nozzle;
- the coupling guard is removed;
- SDS is disassembled in series (be sure to do no harm): ball, washer, spring.
The way how to change the chuck on the chuck is simple. it is removed by analogy with the device for a drill on a threaded connection.
The assembly of the device is performed strictly in reverse order. It is worth noting that the above procedures should not only be performed to repair or replace the chuck on the peorator or drill. It is also important for the purpose of maintenance and inspection of a serviceable tool.
Briefly about the main points
The drill and foot drill cartridges are designed differently.
There are two ways of attaching the cartridges to the shaft of the power tool: by screwing them in or by tapered connection (Morse taper).
The disassembly of clamping devices is carried out in the same sequence as the installation.
Know the procedure not only for the replacement or repair of a defective chuck, but also for its periodic maintenance and inspection.
Problems with clamping mechanism
Before you start work, read the instructions for use with the tool. This will help prevent many problems. Remember that the drill should not be used for milling, because the clamp can not withstand this lateral load. Choose the right drill bit, pay attention to its sharpening, mark the center of the drill (with a core bit).
Sometimes the clamp jams during disassembly. If so, the unit is disassembled and thoroughly cleaned and lubricated. It happens especially often after drilling holes in the ceiling because the debris falls down inside the clamp. If the clamp comes off, increase the tension in the cone connection. To do this, the assembly is heated to 110º in an oven and then installed in its cold seat. Runout caused by uneven breakage of the cams or wear of the tapered base is also possible. Here you need to replace the elements.
When disassembling a chuck, consider its type. After completing the procedures, reassemble in the reverse order.
Chuck types
Now there are two types of this part:
The first type has additional categories:
- double-coupling. it is possible to unscrew and tighten with two hands, one coupling is held, the second is twisted to remove the tool;
- single-fingered. all the operations described above are performed with one hand, this is facilitated by the system of locking the shaft during the removal of the nozzle.
A common characteristic of the quick-clamp varieties is to change the tooling without the help of special tools.
The material from which the chuck is made:
Plastic products are lightweight, but are not shock resistant. Quick-clamping variations are used both in everyday life and in production.
The cam versions are more reliable, they are more shockproof and robust, but the disadvantages are the relative weight of the part.
Types of fastening
Fastening takes place with:
The first connection is named after the surname C. А. Morse in the 19th century. Alignment occurs by engaging the surfaces of the shaft and cone with the bore due to the identical taper. The fastener is widely used because of its simplicity and reliability.
In the second kind of connection, the shaft and the chuck are threaded. Alignment occurs by threading the chuck onto the shaft.
The third type is a modification of the threaded fastener. for security, the connection is secured with a screw. It mostly has a Phillips-head screwdriver and a left-hand thread. The screw can be seen only when the cams are fully opened.
Definition of attachment
Cartridge fastening is determined by visual inspection. The Morse taper is marked as follows: 1-6 B22. The first figures are the diameter of the shank of the used nozzle and B22 is the size of the cone itself.
The threaded connection is also identified by numbers and letters, for example: 1.0. 11 M12×1.25. The first part of the marking shows the shank diameter of the tool, and the second part shows the metric value of the thread. Imported electric screwdrivers are specified in inches.
Disassembly step by step instruction
Sometimes it is necessary to disassemble it for the following reasons:
Practice shows that the easiest and most common way of disassembly is with a screwdriver.
- Removal of dust cover from a torus.
- Inserting a small adapter.
- Slide the ejector jaws inward, squeezing the cartridge as far as they will go.
- Between the chuck and the wall put some cushioning material, a piece of structured polystyrene or rubber, for example.
- Press the drill with the dismountable chuck and the shock absorber against the wall.
- Engage the accelerator by engaging it in striking mode.
- In a few seconds, the chuck components should be unscrewed, i.e. the chuck has been disassembled.
- Now the jaws should be removed and the operator should carry out a visual inspection.
If the drill was used for drilling into walls, there is a high probability that dust, cement, small particles of bricks, etc., may be present inside the tooling. Remove debris and wash with kerosene if necessary. Then, after wiping the parts, lubricate them with grease.
It is important not to interchange the cams. To avoid this, use the markings on each part and sign them as well as the positions of the seating.
Next, you need to do the following:
- Extend the cams forward.
- Insert the nut (consisting of two shells) that can be used to unscrew and tighten the cartridge in its place with a spanner.
- Remove the cams by unscrewing them from the device.
- Put the cartridge block in its place.
- Inserting the cage. This can be done in various ways, such as with a lathe. In this case the front part of the jig is clamped in the machine chuck, and the rear part is pressed by the tailstock. A simpler “home” method is as follows: take a solid metal plate, on which the disassembled equipment is placed. A thick washer made of non-ferrous metal is placed on top of it. By lightly striking the washer with a hammer, press the cage into place.
The assembly is suitable for further use.
The tools for carrying out the work are
Drill chuck replacement is easy, if you know the design of this node and methods of fixing it. You will need a simple set of tools to carry out the repair:
- Locksmith’s vise, you can use not standard, but a smaller version for home use;
- steel hammer;
- a carpenter’s mallet;
- Pliers or pliers;
- a medium-sized pipe wrench;
- a set of wrenches;
- caliper;
- screwdriver;
- file;
- sandpaper for grinding.
The list shows the minimum set, there are situations when you may need other locksmith tools.
How to remove a chuck with a threaded connection
The question of how to remove the chuck from the drill, which is fixed on it by means of a threaded connection, arises in home masters quite often. To remove such a chuck, you must take into account the fact that it is installed with a non-standard left-hand thread.
The threaded element of the clamping device is in its interior, so you must first widen the clamping jaws as much as possible, which will provide access to the fixing screw, which can be unscrewed with an ordinary Phillips screwdriver. In drills without such a screw, the chuck is simply twisted off their shaft without performing the above preparatory work.
The head of the fixing screw can be a Phillips head, a straight head, a hexagonal head, or even a “star” head
The left-hand threaded screw that secures the threaded chuck to the drill can wear out over time. To restore the reliability of such a connection, you can perform the following steps:
Such actions will not damage the fastening node of the drill, but will allow you to fix the clamping device on it more accurately and reliably.
Chuck replacement threaded type on the drill can also be performed with a wrench for 14, which greatly facilitates this process. In order not to make mistakes when you are going to dismantle a chuck of this type, you can first get acquainted with the theoretical material on the subject and watch the appropriate video.
Chuck replacement and disassembly on the drill
In the question of how to replace a worn chuck on the drill, there is nothing complicated. To do this, just buy the appropriate clamping device, remove the old from the drill and install the new one on it. It should be borne in mind that both conventional and minidrills can be equipped with two types of chucks:
Chucks, which use a thread to install on the drill, are removed and fixed according to the above described scheme. When replacing such a device, it is not enough to know that it is threaded, it is also important to take into account the markings that are necessarily applied to it. Marked such clamping cartridges can be as follows:
The interval 1,5-13, present in these designations, indicates the minimum and maximum diameters of the installed cutting tool. The rules for replacing a chuck in a drill suggests that the new chuck must have the same marking as the old one.
With the question of how to replace the tapered chuck on the drill, everything is somewhat simpler. This type of devices can also have different markings, namely:
To replace a chuck of this type on the drill, you simply need to pick up a clamping device with the appropriate markings and insert its seating part into the cone hole of the drilling equipment. Orientation in such a marking is simple enough: the letter “B” means that it is a chuck of the cone type, and the number indicates the diameter of the lower part of the landing hole.
To remove the taper chuck from the drill is as easy as to install it. In order to perform such a procedure, you simply need to knock the chuck out of the seating hole of the drill, for which you use an ordinary hammer. The details of installing and removing the taper chuck of an electric drill can also be found by watching the corresponding video.
On Soviet drills, the chuck with cone mount was simply knocked out, the gearbox design allowed such roughness. To remove the chuck of modern models, you must use pullers or special tools
How to disassemble the chuck of an electric screwdriver or drill? Such procedure is necessary for periodic maintenance of the device (cleaning and lubrication of all its internal elements), as well as its small repairs. This will greatly extend the life of the chuck.
When disassembling the chuck, consider what type it belongs to. Guided by the instructions or video, it is necessary to perform all actions on disassembly of such a device as carefully as possible not to damage its constituent elements. After all maintenance or repair procedures for the drill chuck have been completed, reassemble it in the reverse order.
If the structural elements are badly worn and it is not possible to restore them, it is better to replace the entire mechanism, which is much cheaper than repairing it.