What is the best way to cut Particleboard?
The easiest way to cut chipboard at home. Use a joiner’s saw with fine teeth. This will evenly perform the cut and get quality material with the right dimensions. Move smoothly, avoid sharp movements, press directly on the board carefully.
angle grinder (angle grinder) is not the best option, of course, when sawing chipboard, but for one-time work will do. The first thing you need to buy to the angle grinder is a saw blade, popularly “saw blade on wood” (including wood chipboard, fiberboard and other wood-based panels), choose the size of the angle grinder, the photo 125-th disk (diameter in mm).
Preparing the cutting tool Particleboard
You can cut the chipboard with an ordinary scroll saw. But in this case it is necessary to choose a tool that has very fine teeth. The use of an electric jigsaw is considered a better option. It should also have a fine-toothed saw. The most successful tool for high-quality sawing particleboard is considered a circular saw, but this tool is not for everyone. This is why it is only rarely used.
How to saw Laminated chipboard without chipping.
Before we talk about the absence of chips when sawing Laminated chipboard and deciding what to saw with, let’s define what it means to saw without chips? Everyone has his own attitude to the amount of them after sawing, to some people one is enough, and for others even a dozen is all right. That’s why let’s look at not one, but three types of home cutting Laminated chipboard, from which you can choose the most suitable one. For obvious reasons we will not consider the use of expensive equipment designed for sawing laminated chipboard, this is the destiny of professionals. We are still amateur furniture makers, so we will use the appropriate tool.
In the photo we have three parts, the upper one is sawn with an electric jigsaw, the middle one with a hand circular saw (parquet) and the lower one also sawed with a hand circular saw, but then it was milled with a hand router. Of course, in each case you can achieve different results, it’s all about experience and skill. But in general, the capabilities of the equipment under consideration give approximately these results on chips on Laminated chipboard.
Chipboard without jigsaw chipping.
In this case three things allow to get more or less good sawing results.
- Guide. Wise up with a guide for an electric jigsaw is not necessary. An ordinary spirit level and two clamps are suitable.
- Choosing a jigsaw blade for laminated chipboard. The saw cuts the laminated layer and the particleboard with its teeth, and accordingly the shallower the tooth, the shallower the chips. The sawing speed must be adjusted accordingly. The direction of the tooth up or down only tells you which side of the workpiece will chip more, the first from the top and the second from the bottom.
- Control over cutting speed. If you feed the jigsaw too much, the saw will begin to bend and lead the kerf to the side and the kerf will not be perpendicular to the plane of the workpiece. After such sawing you don’t have to dream about gluing the edging.
Now let’s consider whether it is necessary to “scratch” the laminate. It may help, but only if the following conditions are met. Since the saw forms chips not only on these layers, but also on the edge layers of the chipboard, it is therefore necessary to “scratch” them too. Width of “scratched” line has to correspond to the thickness of the saw (if you make it narrower then it stabs, if you make it wider then it leaves a mark on the workpiece). The lines must be exactly one above the other and the sawing must run straight along the line. Think about how realistic it is to do this at home with your own hands, and the answer to “scratching” is obvious.
Sawing laminated chipboard with a parquet.
The cause of chipping in this case is the impact of the cutting teeth, but not only in the direction of the kerf, but also on the opposite side. (The vibration of the power tool does not allow to run the parquet perfectly straight resulting in misalignment of the disk relative to the kerf). the guide in this case not only allows to saw the chipboard straight, but also prevents the appearance of chips on the opposite side from the sawing direction. When choosing a disk for sawing laminated chipboard, it is worth paying attention to the number of teeth, the more teeth, the cleaner the kerf.
Chipboard without chips using a hand router.
Before processing furniture parts with a router, it is necessary to saw them out with a reserve of 3-5 millimeters on each side to be processed. Unlike previous sawing methods, the hand router leaves behind a perfect surface. Chipping after such processing is rare, and it turns out to retain the perpendicularity of the cut. Up to now we have only considered straight sawing, but when it comes to cutting circles and curves of all kinds, there is no alternative to the jigsaw and router. The disadvantages of using the cutter can be attributed to the need of skills in working with it. We will talk about them in other articles.
How to cut laminated chipboard evenly?
Saw chipboard at home If you do decide to saw chipboard yourself, prepare a hacksaw with very fine teeth or, even better, prepare an electric jigsaw. The coarse-toothed saw blade gives you the smoothest, most accurate cut on chipboard.
Can a chainsaw be used to cut chipboard??
It should be noted multifunctionality in the work of the chainsaw, because with its help it is possible to saw not only wood but also foam blocks, aerated concrete, cinder block, chipboard, and even stone.
The saw blade is definitely blunted because there is glue in the chipboard. That’s why in any case you need to buy a saw blade with more teeth (it will not be as warm). For a 200 millimeter diameter blade, this number is 64.
Can a chainsaw be used to cut chipboard??
It is necessary to note multifunctionality in chainsaw work, as not only wood but also foam blocks, aerated concrete, cinder block, chipboard and even stone can be sawed with it.
The saw blade is definitely blunt because there is glue in the particle board. That’s why in any case you should use a saw blade with more teeth (it will not be as warm). For a blade with a diameter of 200 mm this number is 64.
How to cut a countertop under the sink?
often the question how to cut a hole for the sink in the countertop is asked by the owners of the laminate board, because in this case it is easier to make a cut. But it is necessary to take into account the subtleties:
- to work on the marking is a repetition of what has been passed (important information);
- to saw with an electric jigsaw, inserting it into the holes prepared with the drill;
- lead the jigsaw blade perpendicular to the surface to be sawed, pressing the tool tightly;
- Sawing countertop should be done from the laminate side to avoid the formation of chips and cracks;
- be sure to support the part to be sawed out, because it may break off under its own weight and form a crack in the slab.
TIP: don’t be lazy and as you move along the sawing line, stop and fasten with tape on both sides (from outside and inside) the place of sawing, so that the sawed part of the tabletop will hold firmly to the last millimeter.
And how to cut the countertop for a round sink? In the same way, using a jigsaw, take your time, passing the blade along the line of the marking, gluing the kerf with scotch tape.

Put the sink into the hole that you make. Fit? The sink must fit freely. If it fits tightly, go over it with a rasp and sandpaper. Clean the formed cut from sawdust, and cover it with a thin layer of sealant.

What tools to use?
If the question arises as to how to saw a tabletop, then first of all it is necessary to decide on the tool for cutting, and most often several tools are used.
For example, using a circular saw, you can get a perfect result, but it is quite an expensive pleasure, because a quality tool costs a lot of money. Therefore, this unit can be found mainly only in special factories.
angle grinder. it has similarity with the previous tool, but the result will be far from ideal. In the course of work with an angle grinder is possible formation of many chips.
Usually, to saw a countertop, the two main professional and interchangeable tools used are a jigsaw and an electric jigsaw.
Professionals in the field of construction divide the blades or, as they are also called, saws into two main categories:
In the case of work with a tabletop, you need the variant that rips on one side.
Before you start the main work, you need to sharpen the blade of the tool well, so that chips do not form in the process of work. With a sharpened blade, before you begin to directly saw the material, you need to make a groove, the depth of which will be about 2-3 mm. This will allow you to perform the work without injury and splintering.

Tools and materials
If possible, it is best to cut the chipboard with a hand router, using homemade guides. This method is not too convenient when cutting large sheets, because when working with this tool requires a table. In addition, this method requires frequent change of cutters. But as a result, you will get cleanly finished, “jagged” edges.

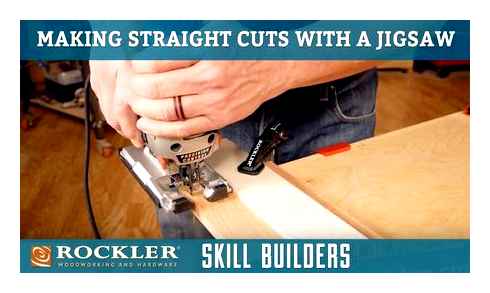
An electric jigsaw is the most popular tool for cutting particleboard
Some masters use an electric jigsaw in their work, but if you lack the skill, it is difficult to perform a cut evenly, and chips can be formed.
You can try to install on the jigsaw a bimetal blade with inwardly sharpened teeth designed for laminate. It is necessary to make a cut with the jigsaw at higher RPM with a small feed, so no cracks are formed.
If such methods do not suit you, then to perform the sawing of particle board at home, let’s prepare to work:
- a hacksaw with fine teeth (the one designed for metal work is best). The teeth should be 1/2 the thickness of the blade and be hardened;
- paper adhesive tape;
- file for roughing out the cut line;
- sandpaper for the finish cut line.
How to Saw Chipboard Without Chipping?
Before you start sawing Particleboard, especially laminated chipboard, use a sharp tool to cut through the trimmer’s guide line, then apply a piece of masking tape with a sticky layer of sandpaper along the guide line. This will help to minimize damage to the decorative layer Woodchipboard.
To have as few chips as possible, the hacksaw movement should be directed at an acute angle to the surface (not more than 30°). Movements should be smooth, with no excessive pressure or jerks.
If, however, chips still can not be avoided, treat wood sawing, first file, working in the direction from the edges to the center, and then a fine sanding sandpaper. It is also possible to mask all imperfections by applying a flexible profile where possible.
Cutting with a panel saw
The most suitable tool for cutting boards and pressed materials of different thicknesses. The cuts are precise, and several parts can be stamped.
Professional machines are used for industrial purposes.
They are small and lightweight (up to 20 kg) and easy to install. Machine can be removed and relocated if needed. Suitable for crosscutting up to 8 cm in depth. It is also possible to saw a tabletop in the home workshop with a circular saw unit with an extended work table.
Household machines are often used in the home.
They are more convenient than domestic ones, as they allow not only longitudinal but also cross cutting. Maximum cutting depth 9 cm. When working, you need to make an accurate marking and observe safety precautions.
Sawing method with undercut
This method also uses a circular saw, but a plunge-cut saw is better suited. a double ruler is needed: it is fixed to the workpiece with clamps. Working principle is the same as for the panel slicer: two cuts are made in one line.
This is what the ruler bar is used for. It is inserted along the marked line, slightly notching the laminate without damaging its texture. Then the material is sawed along the marked track.
By the way! Thanks to the notch on the laminate in the second deep sawing you will not get splinters.
The place where it is sawn off can be sealed with an edging strip.
The tabletop can be sawn into one or more pieces using this method. Minimal splinters are possible, but they can be easily removed by simple sanding or by hiding with a decorative overlay.
Round cuts can also be masked.
Disadvantage: Only straight cuts can be made with this method.
Sawing method with undercutting
This method also involves the use of a circular saw, but a plunge saw is more suitable. You need a double ruler: it is fixed to the workpiece with clamps. The working principle is the same as for the panel slicer: two cuts are made in one line.
This is what the ruler bar is used for. It is set along the line of the mark, lightly notching the laminate without damaging its texture. Then the material is sawed along the marked track.
By the way! Thanks to the notch on the laminate in the second deep sawing chipping is not formed.
The sawing area can be closed off with an edging strip.
With this method the tabletop can be sawn into one or more pieces. Minimal splintering is possible, but it can easily be removed by simple sanding or by hiding with a decorative overlay.
Round cuts can also be masked.
Disadvantage: only a straight cut can be made with this method.
Do not saw with what?
Angle grinder or angle grinder. something you shouldn’t use to saw the countertop. Some masters advise this method to save time. However, it has more disadvantages than advantages.
Use a spirit level to make accurate cuts.
First of all, the quality of the parts is not good: because of the abrupt movement of the disc are many chips. Secondly, if large discs are used, there is a high probability of injury.
Professionals make cuts better because they have special tools.
In addition, after the work is left a lot of dust, which is unacceptable in the home.